Do You Need Ramps to Change Your Oil? Ramps vs Jack vs No Lift
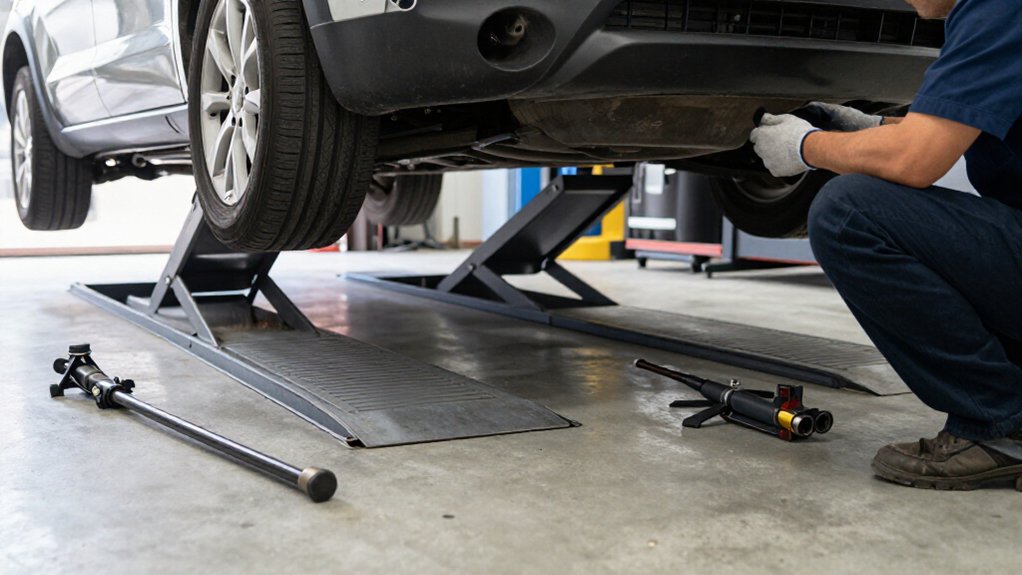
You don’t need ramps to change your oil, but you need access to the drain plug and filter.
On level ground, skip lifting only if you can reach both and fit a drain pan underneath.
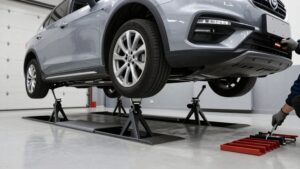
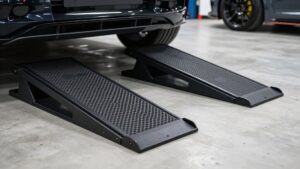
Use ramps when their capacity, approach angle, and clearance suit your vehicle; choose rated jack stands if ramps block access.
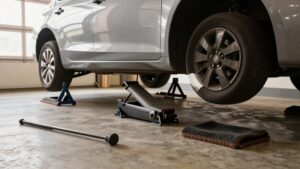
Never work under a jack alone.
Chock grounded wheels, set the parking brake, and check the manual.
Learn which setup fits.
Oil Pan Clearance
Can your oil pan clear the ramps as the front wheels climb? Oil-pan clearance determines whether ramps can support your oil change. The tires must rise enough for the pan to pass above the ramp’s lowest surface and end without contact. A claim of “like 6 inches” doesn’t guarantee fit; your vehicle’s lowest point controls the usable space. Low-clearance cars may strike ramp bodywork before the tires reach the ramp surface, making the setup unsafe or unusable.
Measure the car’s lowest clearance and compare it with the ramp’s height where the wheels will rest. Confirm you can reach the drain plug and remove it while the car is supported at that height. If access requires lowering the pan below the supported level, don’t proceed with ramps.
Ramp Angle and Approach Clearance
Before driving onto ramps, check their angle against your car’s approach clearance. If the front bumper or underbody sits low, it may strike the ramp before your tires climb onto it. Compare the ramp profile with your vehicle’s clearance; similar brands won’t suit every late-model car.
| Check | Action |
|---|---|
| Ramp angle | Verify front clearance |
| Floor traction | Secure ramps on concrete |
| Stopping point | Use a spotter |
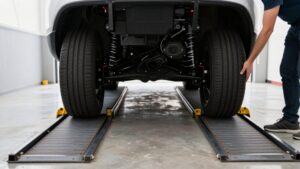
On smooth floors, ramps can skid during ascent. Position them carefully and add a friction layer if needed; don’t rely on weight alone to hold them. Drive up slowly, then stop before the ramp ends. Have someone watch and signal you, so you don’t overshoot.
Once parked, set the brake and confirm the vehicle sits securely. Check height before working underneath.
Drain Plug Reach
Once the car is secure on the ramps, check whether your drain pan fits beneath the plug.
With ramps, the plug sits closer to the ground, so a standard pan slides underneath without jacking. Estimate the plug’s height above the concrete before you begin. Even six inches of clearance may leave little room if you’re working under an SUV or using a taller plug.
A jack alone can leave less space for positioning the pan, particularly on a low-slung vehicle. On level ground, you’ll need a low-profile pan and careful placement because the plug sits well above the floor. Before loosening the plug, slide the pan into place and center it beneath the opening. Don’t start draining until it sits securely and can catch the stream without tipping or spilling.
Oil Filter Access
Your filter’s location determines whether ramps give you a clear path underneath. Check that you have enough clearance to remove it and room to position your filter wrench without awkward reaches.
If the ramps obstruct access, don’t crawl under; compare their clearance with a properly supported jack-stand setup.
Filter Location Matters
Filter access depends on where the oil filter sits: ramps help only if you can reach it from below and have enough room to turn your hands or tools without hitting the ramp, splash shield, or underbody covers.
| Location | Likely access | Check |
|---|---|---|
| Front/underside | Ramps may work | Verify reach |
| Angled/covered | Stands may suit better | Position support safely |
On a low-front vehicle, the underside can meet a ramp before you reach the filter. If it sits behind an undertray or points at an awkward angle, jack stands or a higher lift may offer a better approach.
Support the vehicle securely at the height you’ll use, then confirm you can reach the housing and fit the correct tool. Check the filter’s orientation first; don’t assume ramps make it accessible. Its location determines which support method works best for your oil change.
Clearance For Filter Removal
Even if ramps suit the filter’s location, check that the car can climb fully onto them without the bumper or side contacting a ramp. Measure ground clearance and compare it with the ramp approach angle before driving up; stop if the body could touch before the wheels seat.
Ramps often add about six inches of clearance, but that may not expose a cartridge-style or deeply recessed filter. Check the vertical and side-to-side space around the filter, especially if a splash shield or crossmember limits hand clearance. More height won’t help if bodywork still blocks access.
If you can’t reach the filter safely on ramps, use properly rated jack stands at the manufacturer’s lift points. Set the height to create the needed clearance, and never work beneath a car supported only by a jack.
Tool Access And Reach
For oil-filter access, ramps can provide roughly six inches of extra clearance and make it easier to reach under the car’s middle, provided the filter isn’t blocked by the wheel well or components.
Ramps work best when you can reach the pan and filter from underneath without removing a wheel. Before driving up, check where the filter sits relative to the ramp edge; stop with the engine-side filter positioned within safe reach, and never crawl beneath a vehicle supported only by a jack. Ensure the ramps sit on level, firm ground, chock the rear wheels, and follow their load rating.
If the wheel well obstructs access, or the filter sits high behind components, use a floor jack at an approved lift point and support the vehicle on correctly placed stands. Stands let you choose greater height and a better approach angle; typical passenger-car models often lift about 11–17 inches. Verify stability before reaching in with your tools.
Underbody Splash Shield Removal
Before you locate the splash shield’s clips and 10 mm fasteners, confirm the vehicle sits securely on ramps or jack stands and has enough clearance for your tools. Remove the fasteners and lower the shield carefully; ramps may limit your reach or tool angle, so use stands if you need more room.
Keep the hardware organized so you can reinstall and secure the shield without missing clips.
Locate Shield Fasteners
Turn the front wheels straight, let the engine cool, then use a light to locate the splash-shield fasteners along its front edge and around the wheel wells.
A floor mat helps you inspect the underside without pressing against hot parts. Before reaching beneath the car, confirm it’s supported securely; on low-clearance ramps, keep your body out from under the vehicle and don’t force a tool at an awkward angle.
Expect a mix of threaded fasteners, often 8–12 mm bolts or screws, and plastic push-rivets or clips. Identify each type before applying force. Threaded fasteners unscrew; push-pins usually release through the center pin or by gently prying the head. Gather a socket and ratchet set plus a trim-clip puller to reduce the risk of broken tabs. Note fastener lengths and shield alignment points for reinstallation.
Remove The Shield
Once you’ve identified the fasteners, remove the splash shield to reach the drain plug and oil filter; ramps may raise the car but still leave too little room to work with the shield in place.
Before lifting, confirm your model’s access points and park on level ground; never work beneath a vehicle supported only by a jack. Remove plastic push-pins, clips, or 10–12 mm bolts with the correct tool.
If the shield blocks the filter housing, loosen nearby hardware or routing as needed, and ease brittle clips free rather than prying hard.
| Fastener | Tool | Care |
|---|---|---|
| Push-pin/clip | Trim tool | Avoid force |
| Bolt | 10–12 mm socket | Keep hardware |
Ramps may not provide side clearance; verify your model allows access without shield removal. Check airflow protection afterward.
Reinstall And Secure
With the car securely supported on the ramps, align the splash shield with its edges and grommets, then start every fastener by hand to prevent cross-threading. Keep the wheels blocked, and don’t treat the parking brake as your only safeguard. Work with the car fully supported; never rely on a jack alone.
If you needed jack stands for clearance, confirm they’re stable before working beneath the vehicle. Tighten each fastener using the specified hardware, without forcing misaligned holes. Check that the shield sits flush, with no loose gaps that could let road spray reach the engine bay.
Confirm every fastener is present and secure, and clear tools from underneath. Only then lower the car from the ramps or stands.
Choosing Wheel Chocks
Choose wheel chocks that fit your tires, and use them to secure the wheels that stay on the ground, typically the rear wheels when the front rests on ramps. Don’t rely on the parking brake alone; it can’t provide dependable hold-down. Place a chock against each side of each grounded tire before you drive onto ramps or lift the car.
| Setup | Chock placement | Check |
|---|---|---|
| Ramps | Rear tires, both sides | Before driving up |
| Jack stands | Grounded tires, both sides | Before adjustment |
Once positioned, check that every chock stays tight and the vehicle can’t roll, particularly on a smooth floor where ramps may shift. If you change from ramps to jack stands, chock again before adjusting anything. Keep clear until you’ve confirmed the setup is stable fully.
Ramp Weight Capacity
Check each ramp’s rating against your vehicle’s weight, including any safety margin the manufacturer specifies; ratings vary by model, and many consumer ramps are rated around 2–6 tons per ramp.
Confirm the exact model’s label and instructions; don’t assume a similar-looking set shares its capacity.
Compare the rating with your vehicle’s weight and any stated allowance, then account for load distribution.
If the manufacturer lists separate front- and rear-axle limits, verify both: your heavier axle may place more load on its ramps.
The ramps must also tolerate ordinary dynamic and side loading as you drive onto them and work nearby, not merely the car’s static load.
If curb weight approaches the limit, choose higher-rated ramps or another support method rather than risk exceeding published capacity.
Securing the Parking Brake
Set the parking brake and put an automatic in Park or a manual in gear before working under or reaching beneath the vehicle. Treat that brake as supplemental; its holding power can vary, particularly if you rarely use it. Chocks always provide a physical backup.
- If you drive onto ramps, chock the wheels still on the ground; rear wheels commonly need blocking when the front rises.
- With jack stands, chock wheels on the opposite side to limit sliding or rocking, even when you’ve set the brake.
- Never assume a firm pedal or lever means the vehicle can’t move; ramps and jack-supported cars can shift unexpectedly.
- Before draining oil, test stability from outside the vehicle and keep your body clear if anything rolls or settles.
Check Your Owner’s Manual
Before choosing ramps or jack stands, consult your owner’s manual: it may restrict lift methods, specify support points and minimum clearance, and warn against working under a vehicle held only by a jack. Check the specified procedure before you position equipment. Low clearance can make a ramp’s body contact the car before the oil pan reaches a workable spot; confirm drain-plug location and access.
| Manual detail | What you should verify |
|---|---|
| Lift method | Use only approved ramps or jack stands. |
| Support and setup | Check points, clearance, wheel chocks, and parking-brake instructions. |
If it directs you underneath, don’t assume ramps provide support; add secondary support when required. Never work beneath a car held by a jack alone, and don’t rely on the parking brake alone.
Conclusion
You can change your oil without ramps if you can reach the drain plug and filter safely on level ground. But don’t force access or crawl beneath a vehicle supported only by a jack. Choose ramps or properly rated stands when clearance is limited; check approach angle, load capacity, and your manual.
Chock wheels, set the parking brake, and secure any splash shield. If anything shifts or feels unstable, stop and reposition before you work.