
How to Choose a Car Lift for a Home Garage: Space, Budget and Use
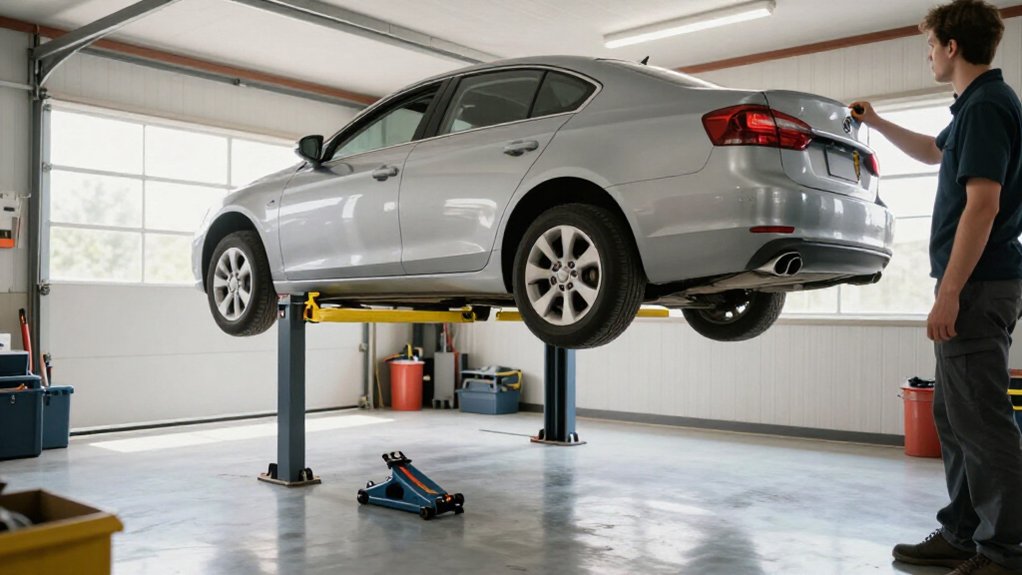
Choose a lift by matching its type and rated capacity to your vehicle’s actual weight and the work you do.
Measure the garage opening, ceiling, door tracks, and vehicle height at full rise.
Have a qualified installer verify slab thickness, reinforcement, and condition; don’t guess.
Compare installation and electrical needs, warranty, and parts support before setting your budget.
Scissor lifts suit quick jobs, two-post lifts offer undercarriage access, and four-post lifts suit storage.
More checks follow below.
Slab Thickness Verification
Before buying a two-post lift, verify that the concrete beneath both posts is thick enough, properly reinforced, and free of cracks or other damage.
Assess the slab directly beneath each post, where the lift transfers major concentrated loads. A floor elsewhere doesn’t confirm those areas can support the equipment. Check for cracking, spalling, or deterioration; don’t install on a cracked or shallow foundation.
Don’t guess slab thickness, reinforcement, or load capacity. Have a qualified structural professional or lift installer evaluate the concrete and verify it meets manufacturer requirements. Budget for this assessment, since repairs or foundation upgrades may be needed before installation.
Proceed only after confirming suitability. Ask them to inspect both post locations and document findings before you commit to purchase or installation.
Garage Door Clearance
Measure your garage door clearance before choosing a lift, since the vehicle must rise without contacting the door, tracks, or other overhead hardware. Measure the opening height, then compare it with your vehicle’s highest point plus the lift’s rated rise. Scissor models are commonly low-rise, up to about 36 inches; mid-rise units reach 36–48 inches, and full-rise models exceed 48 inches.
Also measure from the driveway to the tracks or rails, including their position when the door opens. At full lift height, confirm the vehicle won’t enter that path or approach the header or other overhead hardware. For a two-post lift, check headroom with the car seated on its arms; even a small conflict can make operation unsafe. Measure first; choose lower-rise options.
Vehicle Weight and Lift Capacity
Once you’ve confirmed overhead clearance, check that the lift can safely support your heaviest vehicle.
Check its rated capacity per axle and compare it with your vehicle’s actual weight. Aim for a rating at least 1,000 pounds above that weight. Don’t guess: verify the manufacturer’s limit for your loading position.
| Vehicle | Check | Practical target |
|---|---|---|
| Pickup/SUV | Many weigh under 7,000 lb | Match rated capacity |
| Portable lift | 3,000 lb per axle | About 15.5-inch rise |
| Two-post | Arms engage frame | Confirm geometry and placement |
| Four-post | Runways support wheels | Confirm adapters and load transfer |
A Jumbo 9,000-pound scissor lift may exceed most home needs. Confirm the lift’s arms, runways, and adapters suit your vehicle; correct symmetrical or asymmetrical positioning determines safe load handling.
Follow manufacturer instructions before every lift.
Lift Types by Vehicle Use
Match the lift to how you’ll use it: a two-post lift gives you underbody access for daily maintenance, while a four-post lift suits long-term storage.
For SUVs and trucks, verify the lift’s rated capacity and your vehicle’s weight before choosing a heavy-duty model. If you only make occasional repairs or have limited space, consider a scissor or portable lift, and follow the manufacturer’s setup and safety instructions.
Daily Maintenance Work
For daily oil changes, brake work, and undercarriage checks, a two-post lift is often the best fit: it provides unobstructed wheel and underside access while taking up less space than many four-post lifts. For SUVs or trucks, consider a four-post lift: its extra columns improve stability and support higher rated capacities.
In a tight garage, a scissor lift rises mostly vertically and sits flat when you’re done; low-rise models reach up to 36 inches, while mid-rise units reach 36–48 inches. For occasional jobs without permanent installation, portable hydraulic lifts or ramp systems offer drive-on access, often with built-in ramps and foot-pedal operation.
Select a capacity rated at least 1,000 pounds above your heaviest vehicle. Position lifting points correctly, secure the vehicle, and follow the manufacturer’s instructions.
Keep the work area clear, use specified adapters, and follow the lift maker’s inspection and maintenance schedule to reduce risk during repeated daily use.
Long-Term Vehicle Storage
When long-term storage is your priority, a four-post lift is often the practical choice: its runways support the vehicle like a parking space, and it typically needs less floor anchoring than a two-post design. For a longer or unbalanced pickup, an adjustable-arm two-post lift can help balance the load and preserve door and tire clearance, while still giving you access for undercar work.
Scissor lifts suit a compact garage when you want a low profile and little obstruction with the lift lowered, but limited clearance and restrictions on standing beneath them make them less suitable for dedicated storage. If you store multiple cars, a stacking option can reclaim overhead space; check runway or arm fit and follow the lift maker’s locking and storage instructions.
Heavy-Duty Vehicle Support
Choose a lift based on the vehicle you’ll support and the work you’ll do: a two-post lift provides clear wheel and underbody access, while a four-post lift better suits truck or SUV storage and stable parking. For brake, suspension, and full-underbody work, a two-post frame-engaging lift keeps wheels unobstructed and uses less floor space. Its posts transfer loads through the frame, so install it only on thick, reinforced, crack-free concrete and follow the manufacturer’s slab requirements.
For heavier trucks, SUVs, or extended parking, a wheel-engaging four-post lift distributes weight across columns, providing a drive-on platform; smaller home units often don’t require floor anchoring. Match the lift’s dimensions and configuration to your vehicle, and choose a rated capacity at least 1,000 pounds above its weight.
Occasional DIY Repairs
If you handle occasional oil changes, brake jobs, or exhaust repairs, a two-post lift gives you full wheel access in a relatively compact footprint. Position its arms only at approved lift points, and confirm frame-engaging pads suit your chassis.
If you need clear floor space between projects, a scissor lift sits flat when lowered and suits maintenance. Choose a wide-platform model for wider vehicles and more working room. Portable hydraulic underbody lifts raise only the front or rear, offering light access without permanent installation for oil or exhaust work.
You’ll need capacity at least 1,000 pounds above your heaviest vehicle, and you should verify wheel- or frame-engagement fits your tasks and positioning comfort. Use rated stands; never work beneath a vehicle supported only by the lift.
Use Frequency and Workload
Estimate how often you’ll use your lift and which jobs you’ll perform: frequent brake or suspension work may favor a two-post model, while occasional maintenance and storage may suit a four-post lift.
Match its capacity and duty rating to your heaviest vehicle and workload, keeping a suitable margin rather than operating near the limit. Consider future needs, too, and choose a setup that gives you the wheel and undercar access your repairs require.
Frequency of Use
How often you use a lift should guide its type, capacity, and safety features.
For frequent work, choose an efficient two-post mid-rise, such as MaxJax with a mobile 110V power unit, or a four-post lift for stable drive-on access. Occasional chores may suit low-rise (up to 36 inches) or mid-rise (36–48 inches) scissor lifts, or portable hydraulic lifts, which cost less and need less setup than permanent heavy-duty systems.
Match the rating to your heaviest vehicle; aim for at least 1,000 pounds above its weight as a margin, especially if you’ll cycle the lift often. Repeated raising and lowering calls for dependable mechanical locks and hydraulic backup. Don’t rely on jack stands for frequent lift work.
Four-post lifts suit extended parking; two-post lifts favor repair access.
Typical Workload
Your typical workload should determine the lift style and capacity. For frequent quick jobs, oil changes, tire rotations, and underbody checks, a scissor lift can suit your needs. It raises the vehicle with limited obstruction; choose low-, mid-, or full-rise travel.
For moderate workloads involving brakes, suspension, or drivetrain service, consider a two-post lift. Its arms leave the wheels and undercarriage unobstructed, but you must position the vehicle at approved lift points.
If you’ll work often or store a vehicle, a four-post lift offers stability and capacity; models may also allow vehicle stacking.
Match rated capacity to your heaviest vehicle, with about 1,000 pounds of margin. Frequent use may justify professional installation and suitable electrical service, such as a recommended 240-volt, 20-amp outlet for scissor lifts.
Duty Cycle Requirements
If you’ll lift the same vehicle often for oil, brake, or suspension work, choose a lift built for regular cycles. Estimate your duty cycle by how often you’ll repeat jobs; frequent use favors shop-grade two-post or four-post lifts with robust safety locks and hydraulic backups. Light, intermittent tasks such as oil changes or tire rotations may suit a portable ram-style lift, but it isn’t ideal for constant undercarriage teardown.
Moderate to heavy DIY work puts you underneath regularly, so choose a model rated at least 1,000 lb above your heaviest vehicle. That margin helps repeated cycles stay within capacity. For recurring stop-and-start exhaust repairs, select equipment designed for regular operation: two-post lifts provide full wheel access, while four-post models support lift-and-park workflows. Check utilities before installation; many scissor or four-post systems need 240V, 20-amp power and 2–3 gallons of ISO AW 32 hydraulic fluid.
Future Usage Needs
Plan for the work you expect to do, not just the jobs on your list today: frequent oil changes, brake, suspension, or exhaust repairs favor a two-post lift for clear under-car access. Estimate workload by tracking how often you’ll tackle these jobs; under-car work makes access and stability priorities.
For heavier or occasional projects, choose a lift rated at least 1,000 pounds above your heaviest vehicle, providing capacity margin for lifting. For parking or storage, a four-post lift supports vehicles on their wheels for placement. For less frequent checks in a tight garage, a low-profile scissor lift rises vertically and stays low when idle. Check installation needs: high-capacity scissor systems may require 240-volt, 20-amp power and hydraulics. Match investment to use frequency.
Power Supply and Wiring
Check the lift’s voltage and circuit requirements before you buy: many residential two- and four-post models use a standard 110V outlet, while some installations call for a dedicated 240V, 20-amp circuit.
Check whether your garage already has the right outlet; upgrading wiring can add cost and delay installation. Confirm the lift’s site-specific power, circuit protection, wiring, and control placement requirements in its installation instructions carefully. Don’t assume a plug-in model needs no electrical planning: safe power delivery and compatible protection matter for reliable operation.
If the lift calls for a dedicated 240V circuit, have a qualified electrician assess and install it rather than adapting unsuitable wiring. For Nussbaum scissor lifts, also plan for about two to three gallons of ISO AW 32 hydraulic fluid.
Parts and Warranty Coverage
Before buying, confirm the lift has positive mechanical safety locks and hydraulic backup protection, then review warranty coverage for the frame and posts separately from hydraulic and electrical components. Check exclusions, coverage duration, and whether terms apply at your garage’s location and electrical setup.
Ask your dealer how quickly it can supply parts for common failures, including master/slave hydraulic components and mechanical adapters; warranty coverage helps only if service and parts arrive promptly.
Confirm you can source wear items such as hoses, control units, and arm or runway components. Some lifts require specific fluid, such as ISO AW 32; check the quantity your model needs.
Verify every replacement part matches your model family and capacity designation, since incorrect hardware may not fit or carry the required rating. Keep the model and serial numbers with your service records.
Anchoring and Installation Risks
A lift is only as secure as the slab and its installation. Two-post models send high loads into concrete, so never mount one on a cracked or shallow foundation. Choose thick, reinforced concrete that meets manufacturer specifications.
For heavy two- or four-post systems, hire a qualified installer; leveling, anchoring, and alignment demand precision. Before purchase, confirm the equipment meets applicable code and labeling rules: IRC 2024 requires the automotive lifting mechanism to be explicitly listed and labeled.
- Check slab thickness and reinforcement against the lift manual; appearance isn’t proof.
- Have your installer level posts and torque anchors to specified embedment.
- Test safety locks before use; inspect anchors and structure regularly.
- Position each vehicle correctly over supports; stop if anything shifts or looks damaged.
Entry Height Clearance
Entry clearance can make an otherwise suitable lift unusable: match the ramp design and minimum platform height to your garage floor and approach so your tires can reach the runways without scraping or bottoming out. For portable underbody-access lifts, check whether your car can climb the built-in ramp onto a roughly six-inch platform.
Before buying:
- Check minimum platform height against your approach slope and floor changes; a rated lift won’t help if tires can’t reach pickup points.
- For mid-rise two-post systems, verify tires and body clear posts and ramp edges.
- Leave staging room to center your vehicle before raising; repositioning risks scrapes.
- Budget for leveling, ramp thickness, or low-clearance adjustments; inspect entry before each lift.
Follow manufacturer approach and positioning instructions.
Conclusion
Before you buy, verify your slab thickness, ceiling and garage-door clearance, vehicle weight, and available power. Match the lift type and capacity to the vehicles and work you actually handle, then check parts support and warranty terms.
Have a qualified installer assess anchoring and wiring; don’t rely on guesswork or exceed the manufacturer’s specifications. Confirm you can drive onto the lift safely and raise vehicles without interference. A careful fit check protects you, your vehicle, and your garage for years.