Should You Buy Ramps or Jack Stands First? Pick by the Jobs You Do
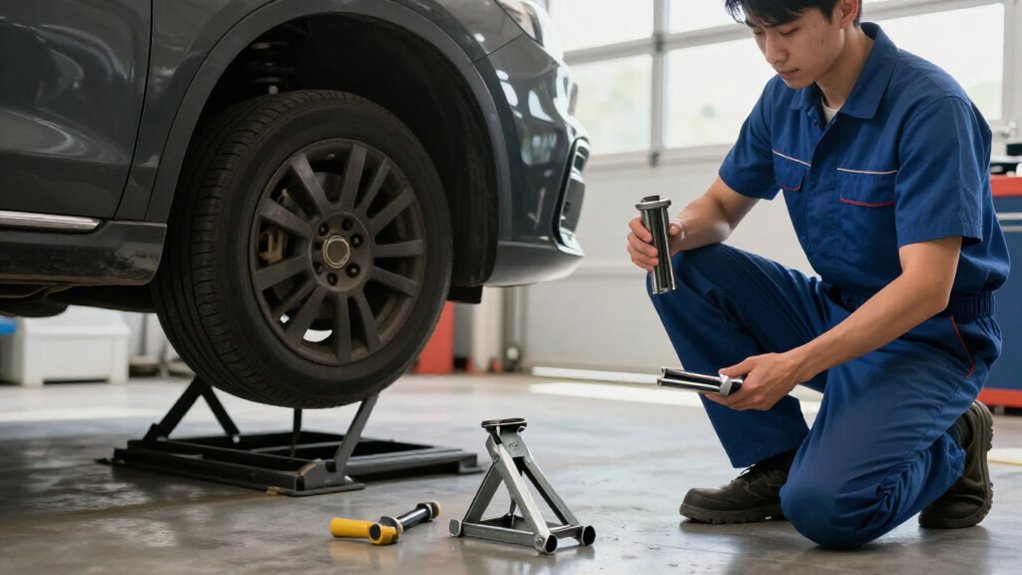
Buy jack stands first if you rotate tires, remove wheels, or need access beneath the exhaust and driveline. They let you support the vehicle with its wheels off; ramps don’t.
Choose ramps first if you change oil or check fluids and can reach the work area safely. Before either setup, use the maker’s support points, level ground, wheel chocks, and equipment rated for the load.
The details ahead can help you choose safely, too.
Oil Changes or Tire Rotations
For an oil change, ramps usually offer the quicker setup: drive the car up, secure it, and drain the oil from underneath. Before choosing ramps, check that your vehicle’s ground clearance won’t let the front end scrape the ramp ends as you drive up.
Set each ramp firmly on a dry, level floor, and block the wheels; the parking brake alone isn’t enough.
For tire rotations, jack stands suit the job better because you must remove and handle wheels. Position the stands only at the vehicle’s rated support points, and select a matched pair whose axle load rating safely exceeds your car’s GAWR.
Follow the stand and vehicle instructions, raise the car on firm, level ground, and block the wheels. Plan each task carefully.
Garage Space and Storage
In a tight garage, jack stands are usually easier to store: they’re compact and tuck away after use, while ramps take up more room. Still, check your layout before choosing.
Ramps can stand vertically against a wall or rest on end, keeping them off the floor if you can secure them against tipping. Their length and bulk may make that arrangement impractical in a small garage. Jack stands use floor space according to their number and placement, so designate a stable, out-of-the-way storage spot where they won’t obstruct walking paths or vehicle movement.
Remember that ramps need to stay positioned for use and require clear driving room in front of your vehicle. If that space is scarce, stands usually fit more easily. Store ramps safely where space allows.
Exhaust and Driveline Access
When exhaust or driveline work calls for access across the underside, jack stands are usually the better first buy: they let you raise one axle or an entire end of the vehicle, while ramps often limit access to the center area. That wider reach helps you work on exhaust hangers, heat shields, and drivetrain components.
If a task requires wheel removal, ramps can’t provide wheel-off clearance; stands can. Ramps still suit quick visual checks when you can reach the target, plus simple inspections or oil checks.
Raise the vehicle with a jack, place stands on solid, level ground, and give the setup a gentle shake before you work. Use stands for adjustable positioning.
| Job | Better fit |
|---|---|
| Wide underside reach | Jack stands |
| Quick checks | Ramps |
Safe Support-Point Placement
Check your owner’s manual and use only its approved lift points, not the floorpan or pinch welds unless specified. Center each stand beneath a strong support point, with its base flat on solid, level ground and clear of the jack.
Before you get underneath, gently shake the vehicle at the bumper or fender to confirm stable contact.
Check the Owner’s Manual
Your owner’s manual identifies the approved lift and support points, such as frame rails or reinforced pinch welds, and whether to use them for raising one end on ramps or supporting an axle or side on jack stands.
Review its diagrams before selecting equipment: designs vary, and the point for raising one end may differ from the point for supporting an axle or side. Verify the locations are reachable at your height. Some jack points support lifting through only about 11–17 inches, while a jack may lift about 15–23 inches, depending on model.
Make sure ramps or stand feet rest on solid, level ground. Check the location again before lifting, especially when adding stands after ramps; shifting can move a support away from its area.
Use Approved Lift Points
Because vehicle support points differ by design, position ramps and jack stands only at the lift points specified in the owner’s manual or factory service information—not on thin floor pans or unreinforced body panels.
For jack stands, set feet on solid, level ground and align each head with a designated frame or subframe point, not vulnerable sheet metal. Check jack and stand reach before lifting: typical floor jacks work around 11–17 inches; a 6-ton jack often reaches 15–23 inches. If the range doesn’t match your lift-point height, use appropriate equipment, not a workaround.
Once the vehicle settles, recheck contact; slight misalignment can shift the load or allow a stand to slip. On ramps, verify wheel-to-underside clearance, then ensure wheels are properly seated before lift-point contact.
Center Stands on Support Points
Before lowering the vehicle, center each jack stand on a flat, strong frame or subframe support point specified in the owner’s manual, not on an unrated pinch weld or thin floor pan.
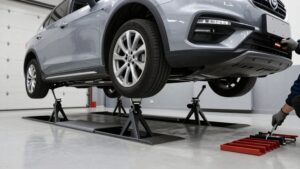
For ramp-first jobs, position the ramp wheels, then place stands at matching strong points on the opposite end; this creates backup support rather than relying on ramps alone. Set each stand’s height for the access you’re doing, but don’t extend it to its maximum travel.
Keep the support pad aligned over the stand’s rated center post or armpoints. When lifting one side, position stands at both front and rear support points as needed to limit side-to-side rocking. Visually confirm that each stand contacts the designated strong pad before you lower the vehicle.
Verify Stable, Level Contact
On level, nonslip ground, confirm each ramp or stand sits flat and can’t rock or slide. Before lifting, check the contact surface and choose solid, even ground; don’t compensate for a slope by forcing the vehicle onto tilted supports.
Set jack stands only beneath the manufacturer’s specified frame or subframe lift points, never sheet metal or weak pinch welds. Check that every foot is fully seated and not teetering.
With ramps, align each tire with its ramp path so the wheels contact the ramp surface first; keep low bodywork clear of ramp ends. Once positioned, gently shake supports to test stability.
If anything shifts, stop, reposition the equipment, and repeat the check. Don’t crawl underneath until the vehicle remains stable at the chosen height.
Cold-Weather Emergency Repairs
For fluid checks or undercar inspections after a snowfall, ramps can save setup time, but drive up only on dry, traction-friendly ground. If you need to remove a wheel for a tire, brake, or suspension repair, use jack stands sized for your vehicle’s lift height instead instead.
Never work beneath a vehicle supported only by a jack; set it securely on stands and block the wheels.
Snowy Roadside Safety
When a snowy roadside breakdown forces a cold-weather repair, choose support equipment based on the task and the ground beneath your vehicle.
Ramps suit quick underbody checks or oil changes without wheel removal, but slush, ice, slippery concrete, or uneven ground can make positioning unsafe or cause slipping.
For wheel-off tire, brake, or suspension work, lift with a jack, set stands on solid, level points, and gently test stability. Never rely on a jack alone.
If you’re on an incline or packed snow, neither option is dependable without a flat, solid base. Add wheel chocks or blocking; don’t trust the parking brake alone. Choose rated gear: match stand-pair capacity to axle load/GAWR and ramp capacity to vehicle GVW. If carrying one tool for more than a quick check, favor stands.
Cold-Weather Setup
Once you’re working on a cold, slippery driveway, choose support based on the repair: ramps give quick access to an oil-drain plug or for basic inspections, but check that low-clearance parts won’t scrape and that the ramps won’t skid on wet or icy concrete. If the job requires wheel-off work or access to suspension or brake components, choose jack stands first; ramps can’t safely support it.
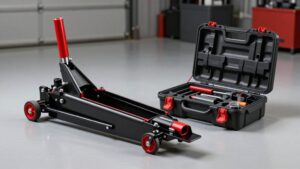
Drive slowly onto ramps; use clean concrete and suitable non-slip traction. For stands, verify their height range matches your vehicle’s jack-point height; about 11–17 inches is common. When practical, use ramps at one end and stands at the other for stable support. Never rely on a jack alone; a sudden drop can cause severe injury.
Emergency Repairs
In a cold-weather roadside emergency, ramps can speed up quick tasks such as checking for leaks or draining oil, since you can drive onto them without repeatedly positioning a jack and stands. For wheel-off work, changing a tire, servicing brakes, checking suspension, or replacing a bearing, use jack stands instead; ramps don’t provide safe access for those jobs. Before you lift, confirm the stands’ height range matches your vehicle’s lift points.
Common points sit roughly 11–17 inches high, while some 6-ton jacks offer about 15–23 inches of lift for quick placement. Never rely on a jack alone. Set each stand flat and secure before going underneath. For tasks needing ramp access plus extra support, use a proper ramp setup and add stands where appropriate.
Gear and Traction
For quick roadside fluid checks, ramps are usually faster than repeatedly positioning a jack, but they can skid on slick winter surfaces.
In freezing conditions, park on solid, level ground. Metal or plastic ramps can slide on smooth concrete; use a non-slip traction aid, such as cardboard, and confirm they stay put. Don’t use ramps if ice or poor clearance makes positioning uncertain.
For wheel-off tire, brake, steering, or suspension repairs, choose jack stands: they support the car at approved strong points and allow wheel removal. Check lift ranges before buying; points may require 11–17 inches, while a 6-ton jack may reach 15–23 inches. Frost can limit placement room. If you can’t assure traction or clearance, buy stands first for your winter work area.
Low-Clearance Bumper Approach
Before driving onto ramps, measure the clearance at the entry point: a low bumper or underbody can hit the ramp before the tire reaches it. Aim the wheels at the ramp first, not the body; contact at the nose can prevent safe positioning. Choose low-profile ramps or removable riser extensions if they provide clearance.
If the car still bottoms out, stop rather than forcing the drive-up. Use a jack to lift one side only enough to place rated jack stands, or add riser blocks beneath the ramps.
If you’re using ramps, drive slowly and precisely on a dry, non-slippery surface; an overshoot can be hard to correct. If you scrape, jack stands are the reliable purchase: adjustable height avoids reliance on ramp grade.
Steel vs. Plastic Construction
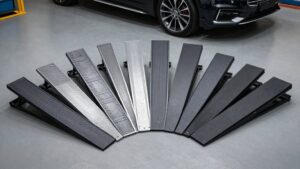
Steel ramps generally resist bending better under repeated loads and imperfect approaches, while plastic ramps are lighter and easier to handle. Choose steel if you’ll use ramps often or need a durable surface for driving up. Steel works best on a flat, solid floor; it won’t give much on uneven concrete, which can leave contact points unstable.
Plastic’s weight makes positioning and storage easier, but smooth floors can let it skid during approach or stopping. Before an oil change, assess the floor and ramp traction, particularly if moisture or slick residue is present. Use rubberized surfaces or prepare the floor to reduce movement.
Whatever material you choose, inspect ramps before each use for cracks, deformation, or worn traction, and don’t use damaged equipment.
Check Load-Rating Labels
Once you’ve chosen a ramp or jack stand, check its load-rating label before buying. Ratings differ, so verify what each label actually measures before purchase.
Check these four label details before you choose:
- For ramps, confirm whether the rating refers to total vehicle GVW; read any “GV rating” and loading notes, because you’ll load one axle at a time.
- For stands, compare the pair rating with the GAWR of the front or rear axle you’ll lift. A four-ton pair suits an axle rated at four tons or less.
- Check whether the rating is per stand or per pair; don’t assume.
- Note height and intended-use limits, too. Your car’s total weight can hide a heavier axle, so verify label assumptions rather than buying by weight alone.
Check Pinch-Weld Adapters
If your vehicle has pinch welds, choose an adapter that matches their shape and fits your jack stand’s saddle firmly. Use these checks before you buy or lift:
- Measure the weld’s thickness and width; narrow or recessed profiles need a matching adapter, not a near fit.
- Match the adapter to your stand’s saddle footprint, then confirm it locks in place without rocking or sliding.
- Check its rated capacity, including use with your stand; keep the combined setup within the stand’s axle or GAWR limit.
- Dry-fit on level ground while another support carries the vehicle. Ensure it sits flat on the weld and clears plastic trim and thin underbody parts before applying any load.
Conclusion
Choose ramps first if you mainly change oil, rotate tires, or need quick, repeatable access on a level floor. Buy jack stands first if your jobs require wheel removal, suspension work, or access beneath exhaust and driveline components. Either way, verify load ratings, use approved support points and pinch-weld adapters, and work on firm, level ground; never rely on a jack alone.
Consider storage, bumper clearance, and cold-weather needs. The tool matches your work.
Transmission Jack: Rent vs Buy Cost Calculator
Compare the cost of renting a transmission jack with buying one, and find the break-even number of jobs from your own rental rate and buy price.
Mechanic Creeper Clearance Checker
Check if you fit under your car on a creeper: enter ground clearance, creeper thickness and body thickness to see the gap or shortfall in inches or cm.
Home Garage Lift Clearance Checker
Check if a car lift, ramp or jack fits under your garage ceiling: usable rise, headroom and pass/fail from your own measurements.