How to Clean an Oil Drain Pan Without Making a Mess
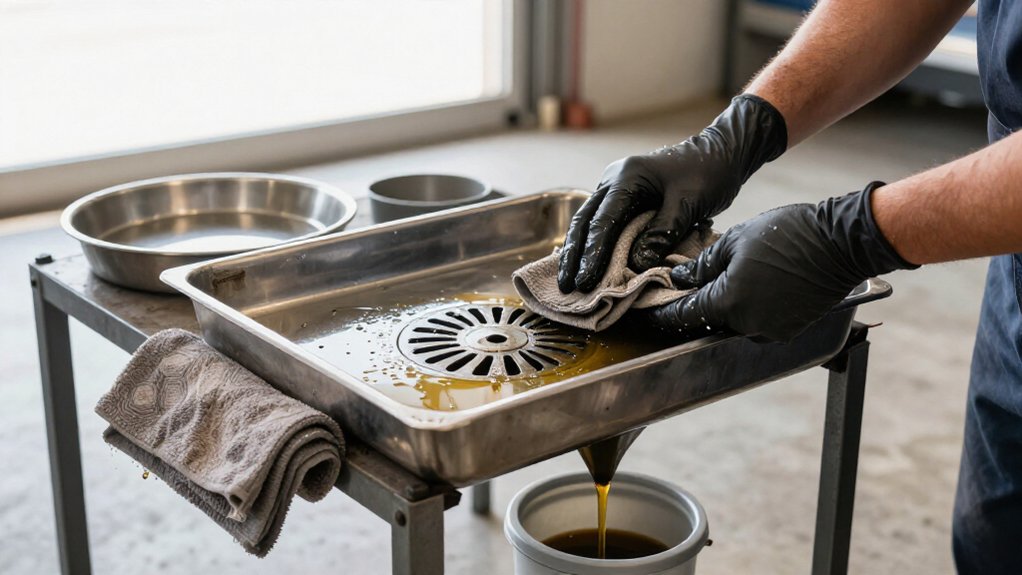
Catch each drop in a dedicated drain pan or bucket before cleaning.
Never pour oil or oily rinse water into a sink or floor drain; seal it for disposal.
Wipe up excess oil with absorbent material, then apply a hydrocarbon-safe degreaser and scrub corners and seams with a stiff nylon brush.
Rinse gently toward the spout, capture runoff, and dry every surface fully.
Keep the area ventilated and protect nearby flooring; find odor-control and cold-weather tips below.
Oil Residue Disposal Safety
To keep oily residue out of plumbing and wastewater systems, catch all oil and cleaner runoff in a dedicated drain pan or 5-gallon bucket. Never pour waste into a sink or floor drain; oily sludge can clog pipes and harm wastewater systems. If you use brake parts cleaner, spray the tray over the capture container and let runoff drip in.
Treat oil, oily rinse water, and absorbed residue as waste oil; take it to a household hazardous-waste site or oil-recycling drop-off. Don’t mix it with household trash or solvents unless local rules allow it. Keep waste sealed to prevent leaks and odors. For heavy residue, absorb liquid with kitty litter or pads in the same container, then dispose of it with captured oil waste.
Tools and Materials Needed
Before cleaning, gather a stiff nylon brush, absorbent rags or kitty litter, a hydrocarbon-safe degreaser, and clean drying towels. Use the absorbent material to lift oil before adding water; a sponge won’t scrub effectively. Choose a product that emulsifies hydrocarbons, such as an industrial degreaser or concentrated dish soap. Keep runoff contained in a dedicated drain pan or five-gallon bucket; don’t send residue into the sink.
Set out these items:
- Nylon brush for controlled scrubbing.
- Absorbent rags or kitty litter for initial pickup.
- Degreaser labeled for hydrocarbon residue.
- Clean microfiber or shop towels for thorough drying.
Dry promptly to limit flash rust on metal and moisture film on plastic. Reserve steel wool for oxidized varnish on metal; soak first to reduce scratching and debris.
Removing Stubborn Oil Odors
For stubborn oil odors, remove the residual film that can oxidize and bring the smell back.
After degreasing, wipe the pan with paper towels, then rinse thoroughly. For lingering odor, soak the dry pan in concentrated degreaser, such as Simple Green, for several hours or up to a day. Follow label directions and wear gloves.
| Step | Action |
|---|---|
| Wipe | Remove residual oil with paper towels. |
| Soak | Use concentrated degreaser on the dry pan. |
| Escalate | Spray brake-parts cleaner; catch runoff. |
| Finish | Dry fully; line with fresh foil. |
If smell persists, spray brake-parts cleaner and direct runoff into a dedicated catch. Dry fully with microfiber, including corners and rim underside; then store with fresh foil.
Moisture and hydrocarbons can revive rancid odors during storage. Keep it dry.
Scrub the Pan Interior
While the pan’s dry, apply degreaser evenly to the oily film and let it loosen stubborn residue. Scrub corners and seams with a stiff nylon brush to clean thoroughly without scratching the surface.
Wipe away loosened grime with shop towels before rinsing.
Apply Degreaser Evenly
Spray degreaser onto the dry pan so it contacts the oil before water dilutes it, then spread it evenly with a stiff nylon brush across the bottom, corners, and drain spout. Work a thin, continuous film over the interior, using controlled strokes to loosen oxidized varnish instead of pushing oil into streaks.
Pay attention to the drain spout, where sludge can cling, but don’t begin a separate seam-cleaning pass. If an area remains sticky while others foam, apply more degreaser there and brush again until coverage looks consistent.
Follow the product label for dwell time; allow only a short soak if permitted, and don’t leave the cleaner longer than directed. Wear chemical-resistant gloves and eye protection, keep the pan stable, and avoid splashing.
Once the cleaner has loosened the film, rinse from the top toward the spout so grime drains inward rather than splattering nearby surfaces. Dispose of oily rinse water according to local requirements.
Scrub Corners And Seams
Once the degreaser has loosened the film, scrub the pan’s interior corners and around the drain spout with a stiff nylon brush; a sponge won’t lift baked-on carbon. Work while residue is softened: add hot soapy water or soak overnight before scrubbing again. Keep the pan stable and wear gloves and eye protection; contain oily runoff.
Direct strokes into seams, where sludge and oxidized varnish collect. For stubborn buildup, scrape gently after soaking, then scrub until the sticky film lifts. Rinse with controlled flow from top toward spout. Wipe completely dry at once, especially corners and seams. Trapped moisture can cause flash rust on steel within days; residue attracts fresh grime. Don’t let rinse water spread beyond your work area; collect it for proper disposal.
Use A Non-Scratch Brush
With the residue softened, scrub the pan’s interior floor, corners, and drain outlet using a stiff nylon brush. Choose nylon rather than a sponge; its bristles lift burnt-on carbon and gritty residue without smearing oil into fine scratches.
Keep the brush non-scratch, especially on metal or coated pans, and don’t use steel wool or metal scouring pads; they can damage the finish and invite rust.
Work firm, circular strokes over the floor and collection points. Direct pressure across the surface, not into low spots, where sludge can settle.
Once you’ve scrubbed, guide a controlled stream of water from the sides toward the drain. This carries oil away as a slurry instead of spreading it back across the pan. Keep flow gentle to prevent splashes.
Break Down Stubborn Residue
If oily varnish remains, apply concentrated degreaser, or blue Dawn dish soap, directly to the dry pan interior so it can break down the sticky film before you add water. Use a stiff nylon brush in circular motions, focusing on corners and the spout, where sludge and metal grit collect. Keep strokes controlled to limit splatter.
For baked-on varnish, let it soak 10–60 minutes; allow longer for buildup, then scrub again. If tacky spots remain, use steel wool only on a pan; it can scratch plastic. Work from dry to wet, adding amounts of water or using a low-pressure hose. Direct flow toward the drain or spout so sludge doesn’t spread across garage. Wear gloves and eye protection, and ventilate when handling degreaser.
Wipe Away Loosened Grime
While the degreaser is still on the greasy surface, scrub the pan floor with a stiff nylon brush; a sponge is too soft to lift grime effectively. Work in circular strokes to break up sticky brown varnish, the oxidized oil film that attracts dirt. Reach into corners and around the drain spout, where hydrocarbons and sludge collect.
Before scrubbing, blot loose surface oil and grime with paper towels or rags so you don’t smear residue around the interior. Follow the degreaser label; wear gloves and eye protection. Afterward, wipe loosened sludge with clean shop towels before adding water; this limits mess during rinsing.
If deposits remain, apply degreaser to those spots, let it soak briefly, then scrub again before the final rinse.
Cleaning in Cold Weather
In freezing weather, bring the covered pan indoors to warm before cleaning, and capture all runoff for proper disposal. Use a mild citrus degreaser or concentrated dish soap with warm water, not boiling water.
Rinse from the top toward the drain spout, then dry the pan completely with shop towels to prevent rust or cloudy film.
Warm the Pan Indoors
When cold weather thickens the residue, bring the drain pan indoors and let it warm passively on cardboard or a towel; don’t use an open flame or other high-heat source, which can increase fumes and splatter risk.
Place a dedicated catch tray or bucket beneath the pan before handling it, since warmed oil flows faster and can escape onto flooring. As the contents loosen, lift oil and sludge with rags or kitty litter and return the saturated material to your waste container; don’t tip or carry a pan that may slosh. Keep the work area ventilated.
After washing, dry the pan completely indoors with a microfiber cloth, paying attention to low spots where moisture can collect. Trapped water can cause oxidation and rust within days. Check the pan’s underside and seams before putting it away, and confirm the catch tray contains any runoff.
Choose a Mild Cleaner
Once the pan has warmed, use a degreaser or concentrated dish soap, such as blue Dawn, to break down cold-thickened oil before rinsing. Choose a formula rated for low temperatures; Simple Green-style degreasers can work well during longer soaks. Apply cleaner to a dry, cool-but-not-frozen pan. Cold slows chemical action, so let the cleaner sit for several hours, or up to a couple of days, if the product directions allow.
This gives it time to soften varnish and sticky residue.
Scrub gently with a stiff nylon brush; avoid hard strokes that can splash oily cleaner onto you. Wear gloves and eye protection, and keep the area ventilated. Rinse with low-flow water on a low setting, working from the top toward the spout. Direct runoff into a dedicated oil drain pan or catch bucket; don’t let it reach soil or a storm drain.
Dry It Completely
Dry the pan completely before storing it, especially in cold weather, when trapped moisture can freeze or promote rust. If the pan’s cold, let it warm to room temperature before washing; water and degreaser can freeze or linger in seams and the drain spout. Use the lightest-pressure rinse you can to limit residual film, then wipe the pan with an absorbent microfiber cloth or paper towel.
Tip the pan and chase water from corners, the drain spout, and beneath the rim with a dry rag or low-pressure compressed air. Keep the air stream directed away from yourself and nearby people. If time allows, set the pan in a warm, dry area near a heater, not close enough to warp it, for one to two hours. Confirm it’s dry to the touch, with no wet or tacky spots, before storing. A wet metal pan can develop rust within days.
No Oily Sheen Remains
To remove the last oily sheen, work degreaser into the dry pan with a dedicated stiff nylon brush, then add hot water to lift the loosened oil.
Scrub corners and the drain lip, where thin films hide. For stubborn varnish, soak in degreaser for 10–30 minutes or longer for heavy buildup, then scrub again.
Rinse gently from top to spout with a hose or pressure washer, flushing corners and lip until water sheets instead of beads. Wear gloves and contain oily runoff. Dry with microfiber or shop towels, including crevices and underside rim, to prevent haze or rust. Wipe with a clean white rag. If it comes away greasy, repeat until it stays clean. Use disposable towels if you need a clean final check.
Cracked Pan Edges
If the pan’s edge is cracked, clean around it carefully so oil and sludge don’t work deeper into the seam. Treat only the outer area first. Place paper towels or kitty litter on standing oil and discard the saturated material as waste; don’t scrub wet oil, which can spread. Keep degreaser and rinse water away from the crack.
For stubborn varnish, apply degreaser to dry residue and let it dwell for a few minutes. Use a nylon brush to clean gently around the seam, without prying. Rinse with minimal water, directing it toward higher areas, and catch runoff in an oil drain pan or bucket.
If the crack widens, shows stress whitening in plastic, or leaks when you tilt the pan, replace it rather than cleaning through structural failure.
Avoiding Drain Splashback
Before adding water or degreaser, let the used oil drain into a dedicated drain pan or 5-gallon bucket, then blot standing oil with paper towels or kitty litter. Wear gloves and eye protection; cleaner and oil can irritate skin and eyes.
- Apply brake-parts cleaner or degreaser, working from the far edge toward the spout so loosened grime travels one way.
- Rinse top-down with a gentle hose flow or low-pressure washer; forceful spray can launch sludge and create splashback.
- Set shop towels or a clean catch tray beneath the pan to catch drips from corners and the underside rim.
- Wipe with microfiber or shop towels, then dry the pan fully so pooled droplets won’t spill when you move it.
Aim the spout into containment.
Protecting Nearby Garage Surfaces
Once the pan’s contained and draining, protect nearby surfaces by covering the floor with absorbent pads or kitty litter and placing a dedicated catch pan beneath the work area. Before scrubbing, direct runoff from degreaser or water into the catch pan; this keeps films off concrete and tools.
Keep rinse water controlled: use a top-down, low-pressure hose and collect runoff for your waste pathway. Don’t wash the pan in a kitchen sink, where residue can enter drains.
If you use brake cleaner, spray over the contained area to limit solvent and grime from reaching surfaces. Wait until drips stop before moving the pan.
For upkeep, line the drain pan with aluminum foil and replace it when filthy, reducing drips and transfer.
Conclusion
Once the pan’s clean, inspect its interior and edges for oily film, cracks, or damage. If you spot a crack, don’t reuse the pan; replace it before your next oil change.
Keep used oil in a sealed, labeled container and take it to an approved recycling site. Wipe nearby surfaces, control splashback, and store your tools dry. A careful final check helps you prevent spills, odors, and unsafe disposal in your garage later, too.