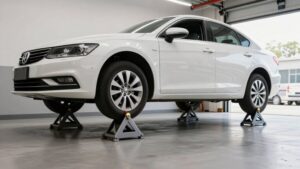
Car Ramps vs Jack Stands: Speed, Safety and Clearance Compared
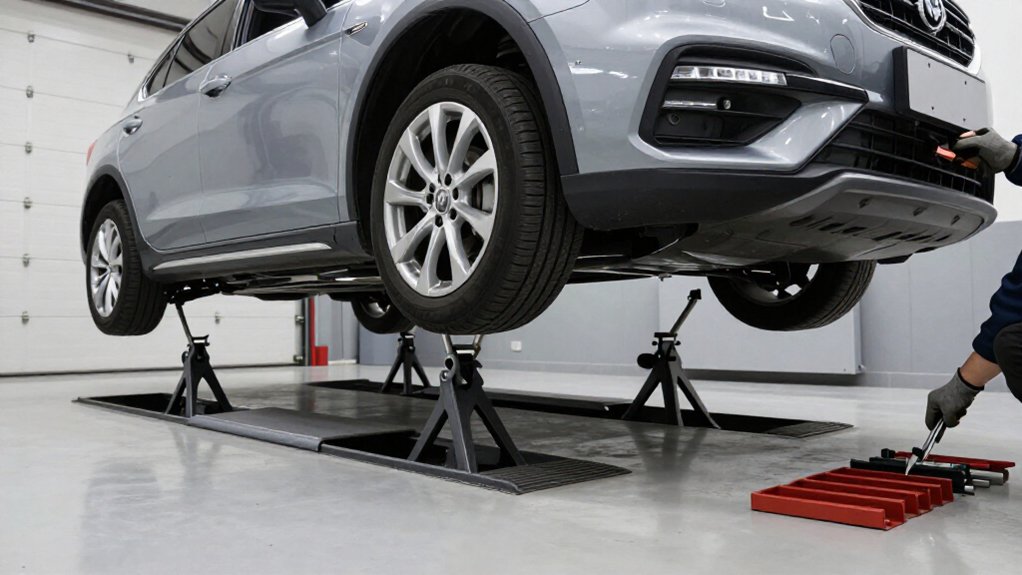
For routine oil changes, ramps usually get you started faster: drive onto level, dry ramps, center each tire, and secure the vehicle. They offer fixed clearance, roughly 2.5–5.5 inches for low-profile models and 6–10+ inches for standard ramps.
Jack stands take longer to set up but let you choose height for repairs. Use rated equipment at approved lift points, lock stands, and never work under a jack alone.
The details below help you choose safely.
OSHA Jack Stand Requirements
Although OSHA doesn’t set one universal jack-stand capacity for every vehicle, you should follow the stand manufacturer’s instructions for setup, locking, and load limits. Choose stands rated for the load at each support point; common guidance cites 2 to 3 tons for cars and 3 to 6 tons for lighter trucks or SUVs.
| Check | Your action |
|---|---|
| Condition | Reject cracks or damaged saddles. |
| Support | Position both stands at solid lift points on level ground. |
Before lifting, confirm the jack can handle the vehicle. Then place stands as the support system; never work beneath a vehicle held only by a jack. Check that pins or ratchets function and lock securely, and that every leg sits fully planted so each stand stays upright. Verify rating and placement before lifting; keep clear until support is secure.
Ramp Incline, Stand Locks
Ramps hold a fixed incline, while jack stands let you adjust height and lock the saddles in place. When you use ramps, check that each surface is dry and nonslick. Guide the vehicle slowly to its designated stop, then confirm it sits securely before you work.
A slick ramp or poor positioning can let the chassis drift, so don’t rely on friction alone.
Choose stands rated for your vehicle, and place each saddle at a height where its pin-lock or ratchet mechanism fully engages. Verify the lock before transferring load; never support a vehicle on a partially engaged post. Set all legs flat on firm, level ground so each stand stays stable under load.
If you change from ramps to stands, position them at the correct lift points and make them the primary support before any under-vehicle work begins, and recheck stability.
Underbody Access and Clearance
For underbody access, ramps typically provide about 2.5–5.5 inches of lift in low-profile models and 6–10 inches or more in standard models, while jack stands offer more adjustable clearance and placement options. Choose ramps when their angle clears your spoiler and underbody components; some late-model cars can snag or won’t fit.
- Check wheel placement so each tire sits fully centered on its ramp.
- Back onto ramps when that positions the drain plug at the sump’s lowest point.
- Keep the surface flat and level; smooth concrete can let ramps skid.
- Use shims, such as cardboard or 2x4s, to improve grip and stability.
- Choose stands for adjustable height or support at designated points; position them precisely.
Never work beneath a vehicle unless its support is stable and secure.
Setup Speed and Workflow
Setup speed depends on the job: ramps let you drive the wheels into position and begin quick maintenance without adjusting support heights. For an oil change or similar light task, that can get you working sooner. Before driving up, check that the ramp sits firmly on level ground and that your car’s clearance allows a safe approach. Low-profile vehicles may contact components while climbing, so stop if you feel resistance or hear scraping.
Jack stands take longer to set up: lift the vehicle with a hydraulic jack, then position and lock a matched pair at suitable support points. The extra steps take time, but stands provide adjustable height and stable support when properly placed.
Ramps typically raise a low-profile car about 2.5–5.5 inches; standard ramps often provide 6–10 inches or more. Choose the setup that suits the task, and never treat ramps as a substitute for secure under-car support.
Wheelbase and Tire Width
Because wheelbase and tire width affect how a car climbs and sits on ramps, check both before choosing a set.
Check ramp capacity and fit, then assess:
- Place ramps so a long-wheelbase car can climb without its chassis or oil pan striking the ramp.
- Match ramp width to your tire; narrow contact lets the tire wander toward an edge.
- Account for wider tires reaching ramp edges sooner during approach.
- On wedge ramps, confirm the supported axle stays centered as load shifts.
- If adding stands, map their support points before positioning the car to avoid lateral shift.
During ascent, a long wheelbase may leave underside spanning the gap. Move slowly, keep wheels straight, and stop if clearance or alignment looks uncertain; add required supports.
Storage Space and Portability
Wheelbase and tire fit affect ramp use, but storage and portability matter once the job’s done. Ramps often simplify storage: many pairs are compact enough to hang on a wall or stand upright, freeing garage floor space. They’re also quick to deploy as drive-on platforms.
Check dimensions and weight before buying, though: one listed 5-ton pair measures about 45 by 13.5 by 10 inches and weighs 68 pounds; another low-profile pair is about 45 by 12.6 by 16.2 inches and weighs 100 pounds.
Jack stands need room for each stand and its adjustment hardware, and setup takes more steps: lift, position, lock, then re-check before you work. Choose ramps for quick deployment and compact storage; choose stands for adjustable height and flexible under-car positioning.
Follow the manufacturer’s storage and use instructions.
Uneven-Ground Stability Risks
Uneven ground can make ramps unstable, so use them only on a hard, flat surface. If one ramp sits lower, the vehicle’s load shifts, raising the risk of slipping or rocking during an inspection.
- A side-to-side wobble can walk a tire off a ramp crest, especially on smooth or dirty concrete.
- Jack stands may tolerate minor imperfections better, but only on solid, non-sinking ground; hot asphalt can let feet sink and tilt.
- Don’t assume a stand is stable just because it looks level.
- If needed, use load-spreading underlayment designed for support, never loose blocks that create new tilt points.
- Before crawling underneath, gently push sideways; any rocking means stop and reposition on level ground.
Proceed only when support remains steady during your sideways check.
Brake and Suspension Repairs
For brake work, you’ll often need wheel-off access, so jack stands usually offer more practical clearance than fixed-height ramps.
For suspension repairs, use stands rated for your vehicle and set them on firm, level ground to keep the car stable. If you use ramps to raise the car, add jack stands as the primary support before going underneath; never rely on a jack alone.
Brake Access and Clearance
Ramps can provide quick clearance for fluid or visual brake checks when you drive onto them on a level, hard surface, but their fixed height may not give you enough room to work comfortably around the calipers or rotors. Low-profile ramps typically lift 2.5 to 5.5 inches; standard ramps, 6 to 10 inches or more. Check whether that height clears your wheel wells and puts components within reach. Ramps can skid on unsuitable smooth concrete, so don’t apply force near a wheel if they may shift.
- For rotor service, ramps alone usually limit wheel removal.
- A jack lets you lift precisely; place stands correctly.
- Stands often reach 13 to 20+ inches, allowing adjustable clearance.
- Use that height when ramp angles restrict access.
- Choose stands for heavier, wheel-off brake work.
Suspension Repair Stability
When suspension or brake work involves removing wheels or levering parts, use jack stands rather than relying on ramps; stands provide adjustable support at the vehicle’s designated lift points. Set each stand straight on the manufacturer-specified point, lock it, and check its rating: about 2 to 3 tons per stand for cars, or 3 to 6 tons for SUVs and light trucks. Chock the wheels and engage the parking brake before lifting.
Never work under a car supported only by a jack. Ramps may help with quick brake inspections, but they limit clearance and can slip on unsuitable or clean concrete. If you use ramps, add jack stands as backup; don’t trust ramp traction alone.
Before pushing or twisting suspension or brake components, test for wobble and correct any instability. Recheck placement if the vehicle shifts during work.
Best Choice for Oil Changes
For routine oil changes, ramps are often your best choice because you can drive up quickly without setting up a jack and stands. Choose ramps that provide enough clearance to reach the drain plug, and work only on a hard, flat surface after checking them for damage.
If ramps don’t provide adequate access, support the vehicle securely with jack stands; never rely on a jack alone.
Best Support for Oil Changes
Because they provide clearance with fewer setup steps, car ramps are usually the best support for an oil change: drive onto them instead of jacking up the vehicle and positioning jack stands.
For safe access, match ramp height to ground clearance and oil-pan access. Low-profile ramps lift about 2.5–5.5 inches; standard ramps roughly 6–10+ inches.
- Park on a hard, flat surface.
- Inspect ramps for cracks or wear, especially plastic models.
- Verify rated capacity exceeds your vehicle’s weight.
- Position the vehicle so the drain plug sits at the sump’s lowest point.
- Use a slight tilt only if the vehicle remains stable.
Secure the vehicle and follow ramp instructions before working underneath.
Check the listed limit; replace any ramp with visible damage before every oil change.
Speed and Setup
Ramps usually make oil changes faster because you can drive the vehicle into position without lifting it or adjusting jack-stand height. Park on a firm, flat surface, align the wheels carefully, and drive up slowly. Once both ramps sit securely beneath the tires, set the parking brake and follow the vehicle manufacturer’s instructions before starting work.
With jack stands, you must raise the vehicle using a hydraulic jack, position the stands, lock them, and recheck their placement. That extra setup takes time and requires careful attention at every step.
Ramps typically need no height calibration beyond proper positioning on level ground, making them a practical choice for routine oil service. Verify your vehicle suits the ramps before driving onto them. For wheel removal or heavier undercarriage repairs, use properly rated jack stands and follow safe lifting procedures.
Clearance for Oil Access
When you need access to the oil drain pan, ramps usually provide enough clearance without extra lifting or setup. Low-profile ramps raise you about 2.5–5.5 inches; standard ramps provide 6–10+ inches, often enough to drain oil without jack stands. Unlike stands, ramps give fixed, nonadjustable clearance.
- Choose the correct ramp direction so the drain plug sits at the sump’s lowest point; backing on may help.
- Check low-profile ramp angle and nose clearance, especially with low cars or vans, before driving up.
- Use hard, flat ground; slippery concrete can let ramps skid.
- Place cardboard beneath ramps as an anti-slip measure, then confirm stability before getting underneath.
Never use ramps that shift; chock wheels, follow limits, and keep the vehicle secured throughout service.
Purchase Cost and Maintenance
Although car ramps usually cost $50–$100 or more per set compared with about $30–$50 for jack stands, price shouldn’t outweigh load rating or condition. Compare ratings before buying: common plastic ramps support around 1,000 lb each; heavy-duty steel sets may rate up to 9,000 lb per pair.
Jack stands commonly rate 3,000 lb each; some 6-ton sets support up to 12,000 lb total. Match equipment to your vehicle and follow its rated limits.
Before every use, check ramps for cracks and wear, especially plastic surfaces that can degrade. Confirm each stand’s locking mechanism and pins engage securely.
Steel stands often last longer and offer varied support heights, but inspect them each time. Ramps offer less height flexibility; you can often hang them vertically.
Conclusion
Choose ramps for quick oil changes when your tires fit securely and the ground is level. Use jack stands when you need broader underbody access or must remove wheels; place them on level pavement and verify locks. Check vehicle ratings, wheelbase, tire width, incline, and clearance before either setup.
Never work beneath a vehicle supported only by a jack. If conditions are uneven or uncertain, stop and reposition safely. Compare purchase cost and maintenance too.