How Many Jack Stands Do You Need? Two vs Four for Real Jobs
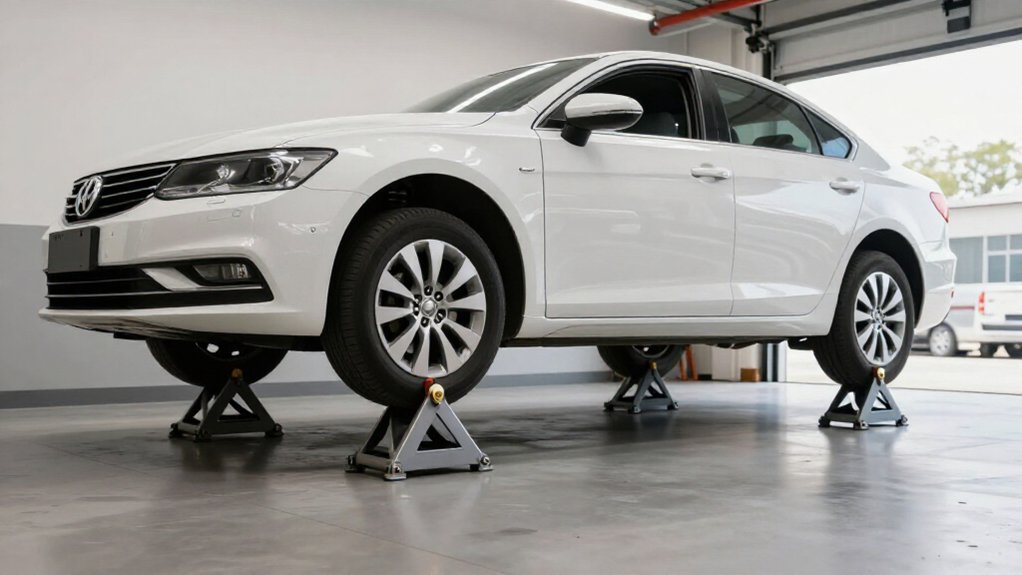
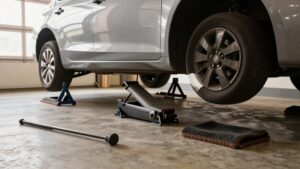
Use two jack stands when you lift one end of your car, placing them at the manufacturer’s support points.
Chock the wheels at the grounded end, front and back, and match stand heights.
Use four stands when you need to raise the whole car, with all four on solid, level ground and locked.
Check pair capacity against the load, and confirm each saddle contacts squarely before you work.
The sections ahead cover safe setup for real jobs.
Two vs. Four Stands
Use two jack stands when you lift one end of the car, and chock the wheels at the opposite end. Set both stands to the same height so the vehicle stays level and doesn’t shift. Check that the pair’s rating covers the load, usually about half the vehicle’s weight.
Use four stands when you raise the whole car. The vehicle’s weight then spreads across all four corners rather than concentrating on two supports. Don’t assume more stands automatically make a setup safe: work on solid, level ground, or put thick plywood under the stands on soft surfaces to reduce wobble.
Getting the car onto stands is the riskiest step. Keep clear during placement, then shake the vehicle from outside. If it slips or wobbles, stop and reset.
Planned Repair and Support Points
For work on one end of the vehicle, support it with two jack stands at the manufacturer-specified frame or suspension points, and chock the opposite wheels front and back.
For full-car repairs, such as mid-floor or underbody work, use four stands, each centered beneath a structural support point, not a thin panel. Match stand heights so the supported end stays level; unequal settings can twist the body and compromise support.
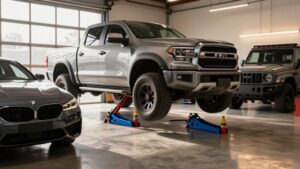
Before lowering the jack, check that every stand is locked at its setting, with its pin or pawl engaged, and that the vehicle’s load rests on the intended saddle at the proper jacking point. Choose stands rated comfortably above the load on each side. When lifting one end, each stand should be rated for at least half the vehicle’s weight; a three-ton pair often suits smaller SUVs, while many trucks and Jeeps call for six-ton stands. After loading, shake the vehicle to verify support.
Stability on Uneven Floors
Even correctly rated jack stands can still shift on uneven or unstable ground, so place them only on solid, even surfaces. On asphalt or softer spots, put thick plywood under each stand to limit sinking and wobbling.
Avoid slopes, bumps, and gravel; bases may shift under load. If the floor isn’t flat, shake all four corners firmly; one settling corner can introduce twist and tipping risk despite correct ratings.
| Surface | Safer choice |
|---|---|
| Soft asphalt | Thick plywood |
| Uneven floor | Reject or level first |
When you use two stands supporting one end, set both to equal height on the same level plane. For four-stand support, ensure every base sits flat simultaneously; plywood can help.
Stand Placement for Brake Jobs
For front-end or rear-end brake access, raise only the axle you’re servicing and support it on two stands at the factory jacking points. Chock the opposite wheels, lock the stands, and lower the vehicle until its weight rests fully on them.
Make sure the raised wheels clear the ground for removal, then check that the stands stay planted before you work.
Front-End Brake Access
When accessing the front brakes, support the front of the car on two jack stands at the manufacturer’s approved frame or suspension points, leaving the rear wheels on the ground. Chock both rear tires ahead of and behind them to prevent rolling. Park on a flat, solid surface.
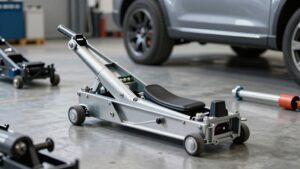
Raise the front with a floor jack at its specified lift point. Place both stands at the correct support points and set them to equal height. Confirm each base sits fully on the surface and each top contacts its support point securely. Stay clear beneath the car while positioning stands.
Lower the jack slowly until both stands carry the front’s full weight. Shake both supported front corners to check for movement. If either stand shifts or wobbles, raise and reseat it before touching brake hardware.
Rear-End Brake Access
For rear-brake access, lift only the rear and support it on two jack stands at the manufacturer-approved rear jacking points near the frame or suspension. You can work without stressing the front end. Before lifting, chock both front wheels from the front and back, apply the parking brake, and leave a manual transmission in gear.
Set both stands on solid, level ground at the same height; uneven support can twist the body and encourage the car to walk. Raise the rear only high enough to remove the wheel and brake hardware. Extra height increases leverage and tipping risk, even with rated stands.
Position each stand at its approved point, and lower the vehicle so it rests on both saddles before beginning the brake work.
Secure Axle Support
For a brake job that requires lifting only one axle, support it with two jack stands, one at each manufacturer-approved jacking point.
Chock the wheels that remain on the ground; when you lift the front axle, chock both rear wheels in front and behind them. Set stands on flat, solid ground and adjust them to the same height. This keeps the axle level and reduces shifting as you work on the caliper and rotor.
Choose a pair whose rated capacity exceeds the heavier axle’s load; a set rated at three tons per pair provides about 6,000 pounds capacity. If reach or base width is marginal at your approved points, choose a higher-rated, pro-style stand. Before touching brake components or getting underneath, visually confirm each saddle’s firm contact, then shake the car. If a stand moves or looks misaligned, re-lift and reposition before you begin.
Wheel Removal Clearance
How much clearance do you need? For brake work, you typically need to remove a wheel, not support the vehicle on four stands. Lift and support the serviced end with two jack stands at manufacturer-specified frame or suspension jacking points. Place each stand close enough to contact solid material and provide wheel, caliper, and rotor clearance. Avoid weak sections that could bend or slip.
Chock wheels remaining on the ground, placing chocks ahead of and behind them to prevent rolling. Set stand feet on firm, level ground; on soft surfaces, put thick plywood under each base to limit settling.
Before going underneath, gently shake the vehicle and confirm both stands stay put and the lifted end remains stable at a height that allows safe brake access.
Emergency Roadside Repairs
For a roadside repair, use two locked jack stands on firm, level ground, lift only one end, and chock the opposite wheels front and back. Stay out from under the vehicle while positioning the stands; once it’s supported, shake each stand to check for movement, and don’t rely on the floor jack.
If the ground isn’t suitable or you can’t set the stands safely, don’t work beneath the vehicle; call for roadside help.
Two Stands Only
Two jack stands can suffice for an emergency roadside repair when you need to lift just one axle. Choose a pair rated for the vehicle’s load; a 3-ton rating means 6,000 pounds per pair, not per stand.
Chock the wheels on the opposite axle at both the front and rear, and leave the transmission in Park or in gear. Lift one end at a time, then position both stands at approved support points. Don’t crawl underneath while the tires are moving or while you’re transferring weight from the jack to the stands.
The handoff is riskiest: lower the vehicle slowly, confirm both stands carry the load, and keep the jack nearby as backup. If the repair requires lifting both axles, two stands aren’t enough.
Firm, Level Ground
On firm, level pavement, use two jack stands only to support one end of the car, and chock the opposite wheels at both the front and rear to prevent rolling. Choose a paved, flat spot; avoid gravel, slopes, grass, and soft ground, where stand feet can sink or slip. Keep each lift force straight up, and position every stand with its base flat and stable before you lower the vehicle.
Once it’s supported, shake the car lightly at all supported corners and check that no stand shifts. Use this roadside setup only for a quick repair; if the car must stay raised longer, move to more stable conditions, such as a garage or a professionally supported lift. Don’t improvise with unstable ground or equipment.
Never Work Beneath
During emergency roadside repairs, don’t go beneath the car—even when it’s supported by jack stands; work beside it instead. For a tire swap or brake inspection, use stands only to hold the vehicle while you work from the side; don’t reach underneath for access.
If you need to lift it, park on level, solid pavement, place two stands at the manufacturer’s frame or suspension jacking points, and chock the opposite-side wheel ahead of and behind it. Set the parking brake.
Never trust a lone jack or improvised drive-on support. Lower the car onto the stands, then shake the bumper or quarter panel firmly. If a stand shifts or vehicle wobbles, stop and reset it before hands-on work; remain outside the underside throughout lifting and adjustment.
Call for Roadside Help
If roadside conditions are unsafe, such as soft ground, a slope, or no stable jacking point, call roadside assistance instead of trying to place jack stands.
If you can work safely, move to level, solid ground, preferably pavement. Uneven surfaces can let a jack or stand shift and tip the vehicle. Use two stands only to support one end, front or rear, and chock grounded wheels.
Keep a portable jack as backup, not support. Lower the vehicle fully onto both stands at approved points, then verify they’re stable before approaching. Never go underneath while the jack alone carries the load.
For multiple corners or full access, use four stands when you can position them safely; two won’t support the whole vehicle.
Frame Rail Clearance
Before lifting at a frame rail, check that your stand’s height range and reach let its saddle sit fully and squarely beneath the rail; a lifted vehicle on large tires may need 6-ton stands just to clear the chassis.
For one-end work, use two stands under designated frame rails, supporting that end while the other end retains contact stability. Match capacity to the load: if the heaviest axle approaches a 3-ton pair’s rating, choose 6-ton stands for added safety margin, even in tight rail locations.
Before lowering, verify full, square saddle contact; partial contact raises slip or tilt risk despite adequate rating. Check that the base sits level and won’t rock; on soft ground, place thick plywood beneath it and recheck clearance all around.
Warranty and Replacement Parts
Check whether the jack stand’s rating is listed per pair or per stand, and confirm the pair’s capacity exceeds the load at your intended height and lift point. Before buying, read warranty terms for use with adapter blocks or plywood; added materials may limit coverage.
ANSI/ASME certification on the label, plus documented capacity, can support a replacement claim. Choose stands with pin-style locks or documented ratchet components, and keep the manufacturer’s part numbers for pins, pawls, or base hardware.
Contact the seller before fitting nonstandard parts; mixing brands can void eligibility.
Inspect each stand before use for bent posts, cracked welds, and rust or pitting. Most warranties exclude prior damage, so don’t rely on coverage for a deformed or corroded stand; replace it promptly.
Damaged Ratchet Teeth
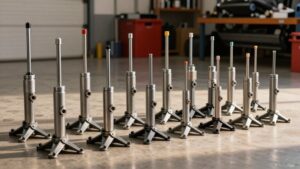
Damaged ratchet teeth can keep the pawl from engaging fully, letting a jack stand creep or drop under load even when its locking pin appears to be in place.
Inspect the ratchet bar and linkage before each use; worn, chipped, or flattened teeth may not lock at your chosen height. After positioning, release jack pressure gently, then check that the pawl seats fully.
Give the stand a careful shake and confirm it holds before you put any part of your body beneath the vehicle.
- Stop if the stand slips or engagement looks incomplete, especially near the last teeth.
- Replace stands with bent linkages, cracked bars, missing teeth, or burrs; don’t force a questionable notch.
- Choose intact, fully formed teeth, and stop using damaged stands.
Confirm Pair Capacity Labels
For accurate capacity planning, read the jack-stand label or handbook to see whether its rating applies per stand or per pair; many ratings cover the pair.
- If the label says “X tons per pair,” treat that figure as capacity for both stands. When you lift one end, the pair supports about half the vehicle’s weight.
- For an axle load near 6,000 pounds, choose 6-ton stands rated 12,000 pounds per pair, or higher, rather than operating near the limit.
- Use your door-jamb sticker or owner’s manual to find axle weights, then round up. If you’re close to the rating, choose more capacity for margin. Verify the stand’s capacity at your use height and follow its intended use; improper setup can reduce safety margins, even when the label seems sufficient.
Conclusion
Choose two stands when your repair needs one axle supported; use four only when you need four wheels off the ground and can support approved points on a level, solid floor. Follow vehicle service information, keep the jack as a backup only if appropriate, and never work beneath a vehicle held by a jack alone.
Check clearance, labels, and ratchet teeth before loading. If the roadside ground’s soft or uneven, don’t lift; call for help.