Are Car Ramps Safe to Work Under? Weight Ratings and Common Mistakes
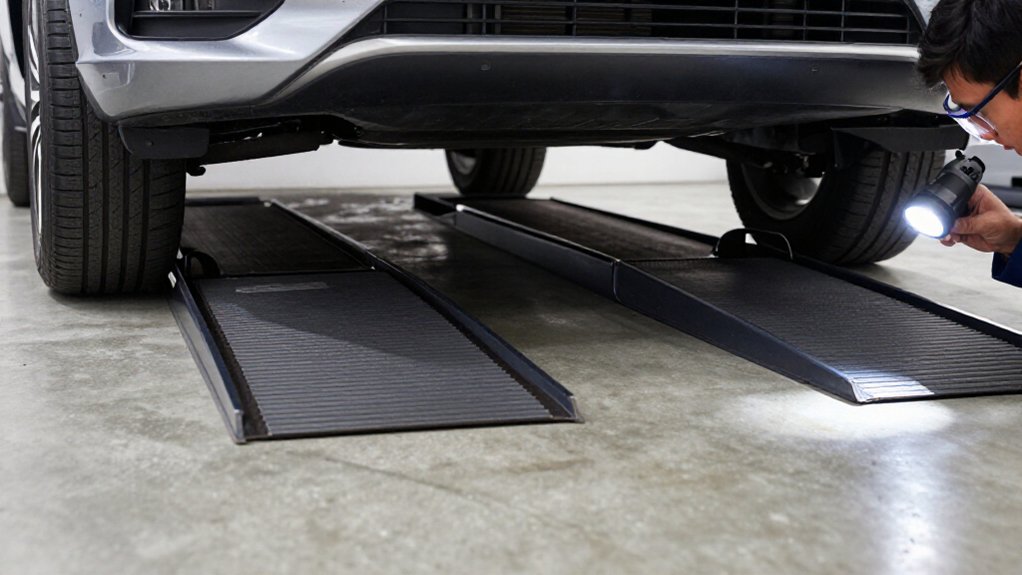
Car ramps are safe to work under only when you match each ramp’s rating to its share of the vehicle’s front-axle load, not the pair rating. Inspect ramps for cracks or bends, park on firm, level ground, and drive straight until both tires sit fully centered.
Set the parking brake and chock grounded wheels.
Check clearance and recheck for shifting before going underneath; the key mistakes and checks below can help you assess your setup.
Rated Capacity vs. Actual Load
Match each ramp’s rated capacity to the vehicle’s front-axle load, not the total capacity listed for the pair. Ramps are usually sold in pairs, but each ramp supports only its own share of the load; don’t treat a pair rating as the capacity of one ramp. Before setup, determine the vehicle’s front-end load, using curb weight and load distribution as an estimate when exact axle data aren’t available. Confirm that this load stays within each ramp’s rating.
A label such as “20 tons” doesn’t override the conditions: use ramps only on a solid, level surface and within their rated limits. Inspect the ramps first. Don’t use a ramp with cracks, warping, or bent sections; damage can reduce its capacity. Never rely on appearance or exceed the rating.
Tire Position Changes Load
As the tires climb onto the ramps, the ramps take the full front-axle load, so confirm each ramp can support its share of that weight. Drive slowly until each tire sits fully on its ramp’s contact surface; keep it centered to limit uneven side-loading and reduce shifting risk. Partial contact can redirect load and encourage slipping.
After parking (Park for automatics, gear for manuals) and setting the parking brake, recheck tire positions; even a few millimeters of movement can change load distribution. As the car rises, the tire-ramp interface carries more vertical load, so inspect for wear or damage that could reduce grip.
| Check | Why it matters |
|---|---|
| Center tire | Limits side-loading |
| Full contact | Reduces slip risk |
| Inspect area | Preserves grip |
Stop if a ramp shifts; reposition before proceeding.
Drain-Plug Access Angle
For an oil change, choose ramps that raise the vehicle enough to reach the drain plug without scraping the front end.
Low-profile ramps use a shallow approach angle, commonly about 10°–15%, so your bumper, splitter, or undertray can clear the ramp before the tire climbs. Their angle matters as much as their weight rating. Choose an extended ramp about 3–5 feet long to spread the rise and limit a harsh nose-dive onto the ramp face.
As you line up, verify both ramps sit on firm, level ground and align with the tires. Approach slowly and keep the wheels straight. Watch the front edge continuously; if the body contacts a ramp before the tire is fully loaded, stop immediately. Don’t add throttle to force clearance.
Reposition or select a shallower ramp before trying again. Once parked, secure the vehicle against movement and confirm drain-plug access before getting underneath. Never rely on ramp angle alone; use the vehicle’s approved support procedure and keep clear during positioning. If access still fails, use a suitable lift method rather than improvising under load.
Ramp Construction Materials
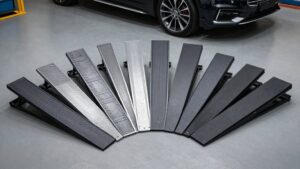
When choosing steel ramps, verify the rated capacity and reinforced load paths; their rigid feel doesn’t replace proper engineering. Plastic ramps can be lightweight and corrosion-resistant, but you must confirm their load rating and inspect their base and traction features.
Before each use, reject any ramp with cracks, warping, rust, or bent sections.
Steel Ramp Strength
Steel ramps gain strength from welded angle steel and internal diagonals that distribute the front axle’s load. These members create a load path that can support force when you position the vehicle correctly. Some commercial-grade sets carry ratings as high as 20 tons per ramp, or 40 tons per pair; use those figures only as examples, not assumptions about your equipment.
Before lifting, confirm each ramp’s capacity exceeds its share of the vehicle’s front axle weight. Never exceed the manufacturer’s per-ramp limit. Choose diamond-plated faces for traction as tires climb on or off, and approach slowly, squarely.
Inspect ramps before every use. Look for warping, bending, cracks, or worn contact surfaces. If you find damage, don’t load the ramp; weakened welds or supports can reduce capacity.
Plastic Ramp Durability
Plastic ramps, often made from LDPE, are lightweight and resist corrosion, but appearance alone doesn’t prove they can safely carry a vehicle. Check the manufacturer’s capacity rating for each ramp, then confirm that the pair can support the front axle’s load; don’t compare the rating only with the vehicle’s total weight.
Use ramps only as engineered, with tires centered on their intended paths and no structural modifications. Store them as directed in a dry, stable place; avoid leaving them in standing water or rain for extended periods. If a ramp is damaged, bent, or buckled, take it out of service; never position it beneath a vehicle.
Before use, set each ramp on firm, level ground and follow its manufacturer’s placement and loading instructions carefully.
Material Wear Signs
Wear can compromise a ramp’s grip and load capacity before failure is obvious. Before each use, inspect the entire ramp, especially its tire-contact surface and load paths. If diamond-plated steel looks smooth or heavily polished, stop using it: reduced traction can let a loaded tire slip. Check plastic ramps for cracks, warping, or soft spots; deformation means repeated axle weight may have weakened rigidity.
Examine metal for rust or deep corrosion, and bin affected ramps rather than waiting. Reject any ramp that’s bent, buckled, or has misaligned edges; its rated strength may no longer apply.
| Warning sign | Required response |
|---|---|
| Smooth steel | Retire; grip may fail |
| Cracked or soft plastic | Replace; rigidity is uncertain |
| Rust, bends, or buckling | Bin; capacity can’t be trusted |
Check pads.
Ground Slope and Surface Stability
Check the approach for slope, and don’t use ramps on a sloped driveway or uneven ground. Set both bases fully and squarely on firm, stable pavement, then confirm they don’t rock or shift.
On smooth floors, clean the ramp traction areas so dirt, oil, or water won’t reduce grip.
Check The Slope
Before positioning the ramps, make sure the ground is flat, firm, and stable. Check the floor’s level before you align the ramps; even a slight slope can shift vehicle weight unevenly, increasing the risk of ramp misalignment or rocking. Don’t assume a floor looks level—inspect it and reposition the vehicle if needed.
Once positioned, confirm each ramp foot sits fully against the ground, without a gap at a crack or raised edge. Partial contact can reduce support under axle load. On a smooth slab, check that the ramp base’s rubber or textured anti-slip surface contacts the floor.
Clear standing water, oil, and slick debris from the ramp contact area before driving up; reduced friction can allow tire slip or ramp creep with equal support.
Choose Firm Ground
After confirming the area is level, choose firm, stable ground for the ramps. Smooth, sound garage concrete is ideal because it supports each ramp evenly under the tire load. Don’t use uneven asphalt, soft soil, or gravel; these surfaces can compress or shift as the front axle loads the ramps, changing their alignment. Avoid any location where the floor slopes or the ramp feet lack full, even contact with no visible gaps.
Before positioning the vehicle, clear nearby clutter, tools, and cords so nothing distracts you while you guide the tires onto the ramps. Check the ramp feet and contact areas for contamination or damage. Anti-slip bases or rubber padding may help on sealed concrete, but they can’t compensate for an unstable or uneven surface. If a ramp rocks or won’t sit solidly when you check it by hand, choose another location; don’t proceed.
Prevent Ramp Movement
Ramps can shift under load if the ground slopes, gives way, or lets their bases slide. Use them only on a flat, firm, level surface. Loose gravel, uneven asphalt, and soft ground can let a ramp move.
Before driving on, confirm each ramp foot sits on the surface and doesn’t rock. If you can move a ramp by hand, stop and choose a location. Clear tools, hoses, and cords from your approach so you can drive straight onto the ramps; last-second steering can push them sideways.
On a slippery floor, clean and dry the ramps’ rubber pads or friction surfaces. If movement remains a concern, a rope or strap laid on the ground may add resistance. Don’t rely on a ramp to stabilize itself.
Crossovers Versus Compact Cars
Crossovers usually climb car ramps more easily than compact cars because their higher ground clearance reduces the risk of scraping the bumper or undertray. Compact cars, especially lowered models, may need low-profile ramps with extended approach angles and inclines around 10°–15°. Choose ramps after verifying their combined per-ramp ratings support the front-axle load.
Before driving on, park on firm, level ground and center each front tire on its ramp. Compact cars’ shorter wheelbases and limited clearance can make misalignment or slipping more likely, so guide the tires slowly and watch their path. If bodywork contacts a ramp before a tire fully loads it, stop. Don’t add throttle to force the climb. Reverse carefully, reposition, or use suitable low-profile ramps to protect splitters and spoilers.
Clearance Around the Undercarriage
Check clearance for the front bumper, splitter, undertray, and crossmember before driving onto the ramps; low cars sit close to the ground and can scrape even when the tires are aligned. Choose low-profile ramps with a gentle entry angle, typically 10°–15°, and enough length, often three to five feet, to spread the rise and reduce front-end dive. Approach slowly, with controlled throttle and steering, and watch the undercarriage as each tire climbs.
If any component contacts a ramp before the tire is fully loaded, stop immediately. Don’t add gas to force the car forward; that can worsen damage. Once parked, confirm both front tires are centered on the ramps, then check for scraping or contact. Don’t go underneath until the vehicle is securely positioned and the clearance check is complete.
Asymmetric Tire Positioning
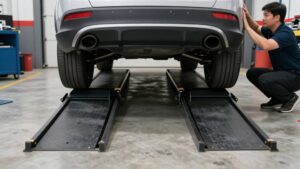
Keep both front tires centered and evenly seated on their ramps; uneven placement can shift the load sideways and increase the risk of slipping or tipping. Before driving up, align the vehicle squarely with both ramp tracks. Move forward straight; don’t steer to catch a tire that’s riding an edge. Stop only when each tire rests fully on its ramp surface.
- Check that each tire is centered across the ramp and seated evenly from side to side.
- Compare the front end’s height; if one side sits higher, stop, reverse safely, and realign.
- Recheck both positions before going underneath, especially with a low-clearance car; symmetry helps prevent drifting or binding.
Never begin underbody work until both front tires remain supported on their ramp tracks.
Verify Wheel Chock Placement
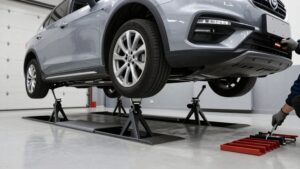
Set wheel chocks firmly against the tires that remain on the ground, usually the rear tires when the front is raised, so they can’t roll in either direction. Use the parking brake fully; keep an automatic in Park or a manual in gear.
| Check | Action | Result |
|---|---|---|
| Chocks | Seated on tread; firm | Reposition if loose |
| Surface | Dry, stable, aligned | Don’t proceed if slick |
Before going underneath, visually confirm each chock sits solidly against tire tread and the ramp surface isn’t slick or loose.
After centering front tires on ramps, give the car a gentle push; stop if it shifts or rocks. Never skip chocks because ramps can shift on uneven ground or when tires and ramps aren’t aligned. Recheck seating before working underneath.
Conclusion
Before you drive onto ramps, match their rated capacity to your vehicle’s axle load, not just its curb weight. Center tires, keep ramps on firm, level ground, and confirm ramp angle provides access without scraping or compromising stability.
Use ramps suited to your vehicle and inspect them for damage. Chock the wheels that remain on the ground. Verify placement and stability before you get underneath; never rely on ramps alone.