How to Bleed a Bottle Jack and Get Rid of Spongy Lifting
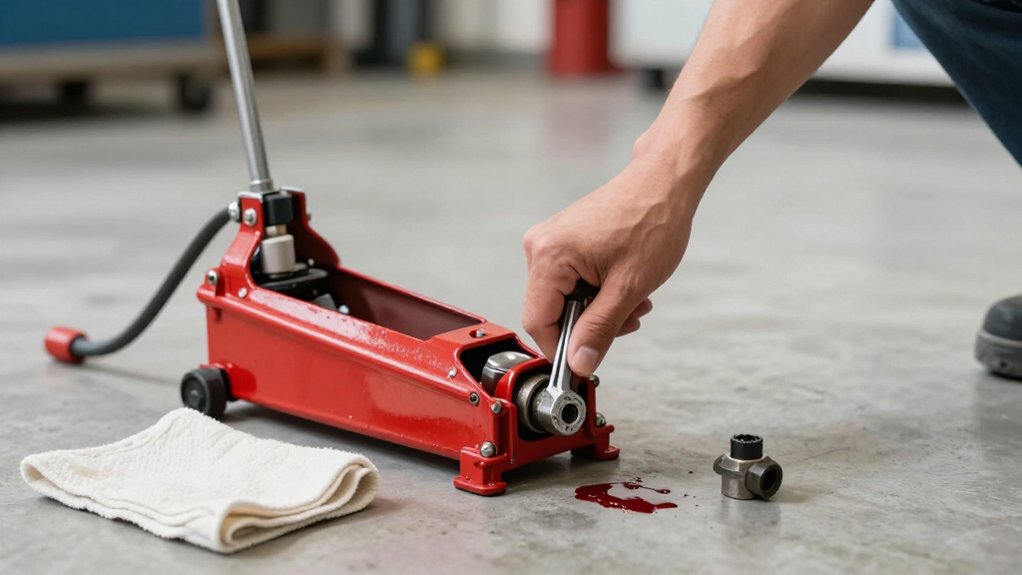
To bleed a spongy bottle jack, park it upright on level concrete, fully lowered and unloaded. Wear gloves, clean around the filler plug, and check your manual for the correct oil and valve procedure.
Open the release valve one to two turns; don’t remove or force it.
Pump slowly through at least twenty full strokes, then close the valve.
Cycle unloaded and test a controlled weight.
If it sinks, stop using it.
Further checks can identify faults.
Spongy Lift Symptoms
A bottle jack with trapped air in its hydraulic circuit often feels soft at the handle, raises the saddle slowly, or fails to reach full height. The lift may feel uneven or require priming before the saddle moves predictably. A jack that lifts firmly for a moment, then loses pressure or lets the saddle sink, also signals a problem.
Trapped air may remain, but persistent loss of support can indicate an internal fault. Don’t treat these symptoms as settling, and don’t work beneath a load supported only by the jack. Keep the load stable with properly rated stands.
After correction, the jack should lift firmly and hold its load with the release valve closed. If it remains spongy or drops, stop using it and seek qualified inspection.
Hydraulic Oil, Bleed Screw, Gloves
If the jack still lifts softly, check its oil level and bleed procedure before using it again. Consult the manual for the correct hydraulic oil. Clean around the fill plug, remove it carefully, and wipe spilled oil so dirt can’t enter the reservoir. With the jack fully lowered and unloaded, open the bleed screw or release valve about one to two turns, as your model requires.
- Pump full handle strokes to force trapped air through the bleed path until bubbles stop escaping.
- Close the bleed screw tightly once air stops escaping.
- Recheck oil level each time; overfilling or underfilling can cause soft, incomplete lifting.
- Wear gloves when handling hydraulic oil, and wipe any leaks promptly; lost fluid can admit air.
- Check for leaks after this bleeding procedure.
Step 1: Position Jack on Concrete
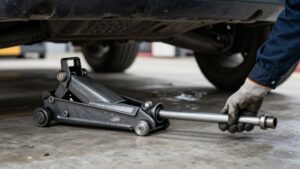
Set the bottle jack upright on flat, level concrete, with its base fully seated and the load path stable. Don’t place it on dirt, gravel, or sloped ground; uneven support can shift under load and make pressure buildup inconsistent.
Keep the concrete around the jack clean and dry. This limits contamination near the oil fill, release, and bleed openings.
Check that the base sits securely and the jack doesn’t wobble. Stable contact prevents movement that could feel like spongy lifting.
Keep the jack upright in the same orientation each time you bleed it. Don’t tip it onto its side on the concrete, because changing position can reintroduce air into the hydraulic circuit.
After lowering it fully, test a lift from the same spot so you can judge any change in feel without changing the contact surface.
Step 2: Open the Bleed Screw
With the jack fully lowered and unloaded, locate the bleed or release screw on the jack body, often near the side or bottom. Check your jack’s instructions if you’re unsure which screw controls the release. Keep the jack stable on its concrete surface, and don’t place any load on the saddle during bleeding.
Turn the screw counterclockwise about one to two turns to open the trapped-air path. Don’t remove the screw or force it; opening it this amount is usually sufficient. Keep your hands clear of the saddle and moving parts. The open screw allows air to escape during the next step.
You may hear or see air leaving through the opening. Leave the screw open only while bleeding, then close it clockwise until snug. Don’t overtighten it, which could damage the screw or its seat.
Step 3: Pump the Handle Slowly
Pump the handle slowly and steadily through full strokes—about 20 cycles when bleeding is needed—so trapped air moves through the open release path. With the jack fully lowered and the release valve open, keep each movement controlled; don’t snap the handle. Complete roughly 20 full strokes when bleeding is required, using a slow pump, a short reset, then another slow pump.
This steady action creates enough flow to carry bubbles toward the vent area. If the saddle rises and then feels spongy, pause and continue deliberate cycles before tightening the valve. Don’t pump rapidly: fast strokes can aerate the oil and make the lift feel soft, even after the first few pumps.
Maintain the same pace and full range throughout. Keep the load off the jack during this procedure, and don’t place any part of your body beneath a raised load. Stop if the jack behaves unpredictably.
Step 4: Purge Trapped Air Completely
To purge trapped air, fully lower the jack and open the release valve counterclockwise, then pump the handle through at least 20 complete strokes with no load. Keep the ram fully retracted so the hydraulic circuit remains at its lowest point. Continue pumping with the valve open until the lifting response no longer feels spongy. If air persists, wipe the oil-fill-plug area clean, briefly remove the plug while the jack remains lowered, then reinstall it before closing the valve.
Turn the release valve clockwise firmly; a cracked valve won’t let the jack build pressure and may cause slow sinking. Wipe away any spilled hydraulic fluid. With no load, pump the handle to confirm smooth, firm lifting and check that the jack doesn’t settle. If it still feels soft or won’t hold, repeat the lowered, open-valve pumping sequence until no further air is expelled. Keep hands clear of moving parts during operation.
Step 5: Check Fluid for Bubbles
Air in the hydraulic fluid can keep a bottle jack feeling spongy.
After lowering the jack fully, keep it upright in its specified bleed orientation; flipping it can draw air back into the reservoir. Open the oil fill plug and inspect the fluid near the opening. Persistent foam or cloudy oil suggests trapped air. Don’t overfill the reservoir.
If you see bubbles, leave the release valve open and pump the handle through several full strokes to move air along the return path. Watch the bleed path for a continuous stream of bubbles; you may hear hissing while air circulates. Continue the bleed cycle until bubbles stop.
Then recheck the fluid level. If it’s bubbly again, repeat the cycle rather than adding excess fluid unnecessarily.
Step 6: Wipe Oil From the Jack
Once the bubbles stop, wipe spilled hydraulic oil from the jack body around the filler plug and release valve with a clean rag or paper towels to keep dirt out of the reservoir. Keep the jack lowered while you recheck the oil level.
Wipe oil from the fill opening before reinstalling the plug, then tighten it. If oil squeezes out, remove it; excess oil or a leak can make future bleeding messier and less effective.
Clean any oil film from the saddle and ram with a rag or paper towel, so you don’t transfer grease to the lifting contact point. Before an unloaded test, wipe the jack’s exterior. A clean surface makes fresh leaks easier to spot; don’t operate it if you find one.
Confirm the Saddle Holds Weight
On a level surface, first cycle the jack with no load, then place a controlled test weight of a few dozen pounds on the saddle and pump until it fully supports the weight. Keep hands and body clear; never work beneath the test load. Mark saddle position against the jack body with tape or a pen. Wait one to five minutes, then check the mark.
Downward movement means the jack is bleeding down and can’t reliably hold weight. Confirm it rises smoothly to normal height without stopping early. A short rise or failure to hold suggests remaining air or an internal check or seat problem. Before bleeding again, verify oil sits near the fill opening without overflowing; low oil can prevent support. Lower the saddle carefully afterward.
Release Valve Won’t Seal
If the jack won’t hold even a light load—around 15 lb of force—after refilling, the release valve may not be sealing; pumping more won’t fix it.
Close the valve firmly clockwise. During bleeding, open it only 1–2 turns; over-opening can dislodge or mis-seat the BB-sized sealing ball and its spring.
| Symptom | Check |
|---|---|
| Slow lowering | Confirm the correct ball sits behind the spring. |
| Won’t hold | Replace a missing or damaged sealing ball. |
Then lower the jack, open the valve, and pump at least 20 full strokes. Tighten the valve and test with no load before use. Don’t invert the jack or leave the valve open longer than needed; either can hinder proper seating. Keep hands clear of the lifting mechanism, and don’t use the jack if it still lowers or won’t hold.
Inspect the Filler Plug
Before inspecting the filler plug, fully lower the jack, remove all load, and wipe the area clean so dirt can’t enter the reservoir. Locate the plug on top of the bottle jack; it may be a screw. Remove it only with the jack unloaded and fully lowered. Check whether the hydraulic oil reaches the fill opening.
If it’s below the port, add the manufacturer-recommended hydraulic jack oil, taking care not to overfill the reservoir.
After bleeding the jack by pumping with the release valve open, reinstall the plug and tighten it securely. A loose plug can let air enter or oil leak out, undermining lifting performance. If the jack still feels spongy, recheck the oil level. Confirm it reaches the fill opening once you’ve removed the plug again, following the same safe preparation steps.
Conclusion
Once you’ve bled the bottle jack, test it under a controlled load and watch for a steady lift. Keep the jack on firm, level concrete, and never work beneath a load supported only by the jack.
If the saddle sinks, the lift stays spongy, or the release valve won’t seal, stop using it. Check the filler plug and oil level; if trouble persists, have the jack serviced or replace it before you lift again.