How to Maintain a Floor Jack: A Simple Routine for a Longer Life
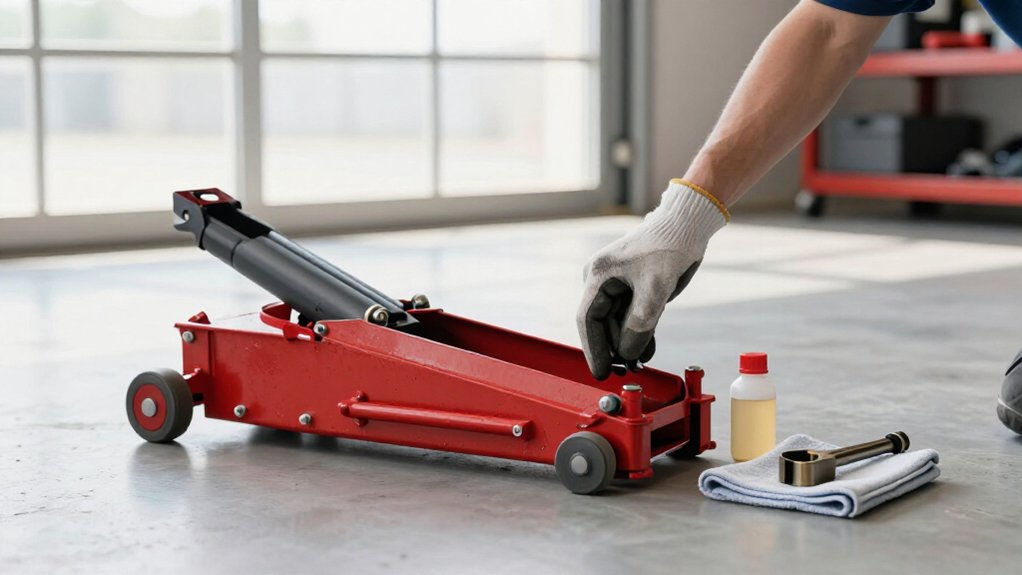
After use, wipe the piston rod, pivots, and casters; dry chrome and store the jack lowered.
Before lifting, park level, chock wheels, and center the saddle on the marked point.
Monthly, inspect the frame, welds, wheels, and leaks; test unloaded for jerks or sponginess.
Check oil with the jack lowered, using specified fluid only.
Bleed air as directed.
In cold weather, warm safely.
Stop for leaks or cracks, secure loads with stands, and use the checkpoints below.
Routine for Home Mechanics
After each use, wipe dirt and grime from the piston, handle pivots, and casters, then check for oil stains or puddles; leaks, slow lifting, or reduced lift height may indicate failing seals that need repair or replacement.
Use this routine. Lower the jack fully before checking the reservoir, and add only the specified hydraulic jack oil, such as AW32, if the level is low. Never substitute brake fluid or motor oil. If lifting feels spongy or uneven, prime 1.5-, 2-, or 3-ton models by turning the handle counterclockwise one to two turns and pumping 10 to 15 times; bleed trapped air if needed.
Every six months, lubricate wheels, pivots, lifting-arm joints, and release-valve threads. Store the fully lowered jack in a clean, dry place.
Level Ground and Wheel Chocks
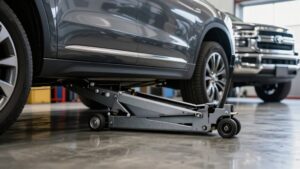
Before lifting, park on solid, level ground, set the parking brake, and put the transmission in Park or gear. These steps keep the saddle aligned and help the hydraulic lift rise evenly.
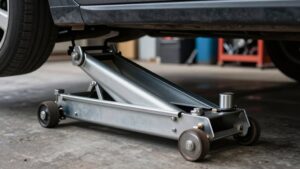
Before you pump, check that the jack’s base sits flat and fully contacts the ground; it shouldn’t rock or sink. Center the saddle under the manufacturer’s marked lift point to limit side-loading.
- Chock the wheels remaining on the ground firmly against each tire.
- Use chocks on both sides to restrain rolling in either direction.
- Don’t rely on the parking brake alone; a tire can shift under load.
- Keep the vehicle’s weight stable as you raise it; stop if anything moves.
- Recheck contact before lifting, especially if ground feels soft, sloped, or uneven.
Monthly and Annual Checkpoints
Each month, lower the jack fully on level ground and inspect the saddle, wheels, handle pivots, and frame for damage, then check for oil leaks.
Pump and lift unloaded; note spongy or jerky motion and hissing or squeaking, and stop use if performance changes.
| Checkpoint | Action | Safety cue |
|---|---|---|
| Monthly | Inspect damage and leaks | Repair before use |
| Monthly | Test unloaded lift; note rough motion or noise | Investigate changes |
| Annual | Add specified oil to marked level; don’t overfill | Use correct fill plug |
| Annual | Clean, lubricate pivots and casters; store lowered and dry | Follow service guidance |
Annually, use specified oil and fill level: about ¾ for 1.5/3-ton models, or to pump-case threads on 2-ton designs.
Don’t overfill. Clean and lubricate moving points; store lowered, clean, and dry before regular use.
Bleed Air From Hydraulics
If your jack feels spongy, lifts slowly, or moves unevenly, trapped air may be the cause. Set it on a stable, level surface, lower it fully, and check the oil before opening the release valve.
Pump the jack to purge air, then close the valve and verify smooth operation before lifting a load.
Recognize Air Symptoms
A spongy feel, slow lifting, reduced capacity, failure to reach full height, or uneven ram movement can signal trapped air in the hydraulics. You may also notice that the jack hesitates under load or won’t lift weight it handled before. These symptoms point to air bubbles interrupting hydraulic pressure, rather than proving the jack has failed.
Compare its performance with operation, and watch whether the ram rises smoothly and holds the load as expected. Air can enter more after travel or storage, so check for these clues before using the jack for a lift. Don’t work beneath a vehicle supported only by a suspect jack. If performance remains weak after air is removed, stop using the jack and inspect it for leaks or faults.
Prepare the Jack
Before bleeding the hydraulics, lower the jack fully on a flat, stable surface and check that the fluid is at the specified level; low fluid can prevent air removal and weaken lifting. Before you begin, consult the manufacturer’s instructions, since valve locations and bleeding procedures vary by model. Keep the jack unloaded; if you’re servicing a vehicle, support it securely on correctly rated jack stands, never rely on the jack alone.
Wear gloves and place an absorbent cloth beneath the area to catch fluid or vented air. Find the bleed valve, often near the rear caster, and make sure you can reach it without shifting the jack. Check for leaks or damaged fittings first; don’t continue if you find a fault. Keep the work area clear, and use the specified hydraulic fluid for any top-up after bleeding. These checks help you work steadily and protect you from unexpected movement or fluid spray throughout the entire maintenance procedure.
Open the Release Valve
With the jack fully lowered, on a flat surface, and its fluid level checked, open the bleed valve to vent trapped air if the jack feels spongy or lifts unevenly. Locate the valve, often near the rear caster, and avoid escaping oil. Use properly rated jack stands for any supported vehicle; never rely on the floor jack alone.
Carefully crack the valve open and let trapped air escape; follow your model’s instructions if it requires handle movement during venting. Keep the valve open until bubbles stop or fluid flows steadily, then close it securely. Check the fluid level again and add only hydraulic jack oil if needed to reach the proper mark. Repeat the procedure only if symptoms remain. Correct fluid level and air removal restore smooth lifting and full strength when your model requires it.
Pump to Purge Air
If the jack still feels weak or spongy, trapped air may be reducing its lift height and pressure. Before purging, ensure the jack is fully lowered and check that the hydraulic fluid reaches the specified level; a low reservoir can make bleeding ineffective.
Locate the bleed valve near rear casters and loosen it. Apply light pressure to the handle and pump, watching the fluid at the valve for escaping air bubbles. Continue pumping and bleeding until the output contains no more bubbles.
Then close the valve securely and top off the fluid if needed, following the specified fluid type and fill level. Air can enter while the jack sits or gets jarred, so purge it before lifting heavy loads, especially after travel or storage.
Check Jack Operation
A spongy feel while pumping, slow lifting, or failure to reach full height often signals trapped air in the hydraulics.
Before bleeding, place your jack on a flat surface and lower it fully. Check that the fluid level is correct; low fluid can introduce more air. Open the bleed valve, typically near the rear caster wheel. Pump the handle while watching for air bubbles escaping.
Continue until bubbles stop, then close the valve. Top off the hydraulic fluid only if the level has dropped.
After travel or storage, when air entry is more likely, test the jack with a no-load lift cycle. Keep the load off during this check, and stand clear of moving parts. Repeat bleeding only if symptoms return again.
Cold-Weather Hydraulic Checks
Before lifting in cold weather, let your jack warm safely to near room temperature so thickened oil won’t impede pumping. Fully lower the ram, then check the fluid level and inspect seals and fittings for cold-weather leaks.
Use only manufacturer-approved hydraulic jack oil, and don’t operate the jack if you find a leak or abnormal resistance.
Check Fluid Viscosity
Cold temperatures can thicken hydraulic oil and slow or weaken a floor jack’s lift, so check that it contains the specified jack oil—commonly AW32—not brake fluid or motor oil.
In cold conditions, thick oil may slow lifting or make the jack feel spongy. Before loading, prime it: turn the release valve counterclockwise one to two turns, then pump 10 to 15 times. Air trapped during cold storage or travel can impair lifting, so confirm priming, fully lower the jack, and recheck the oil level.
Add only specified jack oil; don’t overfill, since excess fluid can prevent lowering. Every few months, run a lift-and-lower cycle without a load. Listen for changes in feel or noise, which may signal viscous oil or air in the system. Use jack stands before working beneath a vehicle.
Inspect Cold-Weather Leaks
In good light, inspect the fully lowered jack for fresh oil seepage or pooled fluid around the ram, seals, and base; cold can worsen seal leaks. Dry-wipe suspicious areas so seepage stands out.
Check the reservoir level with the jack fully lowered, and add only the hydraulic jack oil specified by the manufacturer, such as AW32; never use brake fluid or motor oil. Slowly pump the handle and note any sponginess, slow lifting, or failure to reach height, which may indicate trapped air and reduced hydraulic pressure.
If you find seepage or suspect air ingestion after storage or travel, prime or bleed the system as directed in the manual. Afterward, make an unloaded test lift, lower the jack, and recheck wiped areas for leaks.
Warm the Jack Safely
Warm the jack by pumping its handle several times while it’s unloaded and fully lowered on a flat, level surface; this circulates cold hydraulic fluid and can reduce sluggish lifting. After travel or storage in low temperatures, check for trapped-air symptoms: a spongy handle, slow lifting, or failure to lift. Temperature changes can increase air bubbles and impair pressure buildup.
If lifting remains abnormal, prime your 1.5-ton, 2-ton, or 3-ton jack: turn the handle counterclockwise one to two turns, pump it 10 to 15 times, then test the lift.
Before checking fluid, lower the jack completely. If the level needs topping off, use only the specified hydraulic jack oil, such as AW32. Never keep pumping beneath a load to force a lift in freezing conditions.
Warm the unloaded jack briefly, complete priming and fluid checks, then retest on level ground. Place a vehicle on rated stands before working beneath it. Follow your jack’s manual.
Piston Rod Stays Dry
After each use, wipe the chrome piston rod clean, then lower the jack fully before storage to keep grit, water, and oil from damaging the seals or causing rust. Remove brake dust before it abrades seals and causes seepage. Don’t leave standing water or hydraulic oil on the chrome; dry the surface with a cloth. Apply only a very light film of non-mess lubricant if your manual permits it.
Excess oil attracts dirt, which can hold moisture against the rod. Store the jack in a dry, covered area or cabinet. If you find rust spots, pitting, or wet hydraulic staining, stop using the jack. Clean and dry the rod, then check the seals and hydraulic system before returning it to service.
Cracked Weld Inspection
Once the piston rod is clean and dry, inspect the jack’s frame and saddle welds in good light for cracks, rust trails, or flaking paint. Inspect undersides and corners, especially welds near lift-arm pivots, saddle-to-frame joints, and the main load path where the jack contacts your vehicle. Paint flakes or rust trails can signal separation, but don’t rely on appearance alone. Run a gloved fingertip along each bead to detect catch points or hairline gaps; use a flashlight to check areas you can’t see clearly.
If you find cracks or spreading damage, stop using the jack immediately and have a qualified technician inspect and repair it; a failed weld can cause sudden collapse under lifting pressure. Recheck welds every six months, before and after abnormal loads or impacts, including rough use on uneven ground.
Incorrect Jack Storage Habits
Store your floor jack fully lowered, with the saddle down, to keep its seals properly positioned and reduce the risk of fluid seepage or internal damage.
Before storage, clean the jack and choose a dry, sheltered spot. Moisture from rain, road salt, or standing water can corrode the ram and moving parts. Wipe dirt from the piston, handle pivots, and casters so grit won’t rest against seals.
Follow these checks:
- Don’t leave the jack half-raised or store it with the ram extended for long periods.
- Cover the cylinder and release-valve area to limit dust buildup.
- Keep it level and stable where it can’t be struck or obstruct a walkway.
- Check that the saddle is down before putting the jack away.
- Avoid damp floors; dry the jack if it gets wet.
Emergency Contact Details
Even with proper storage, a floor jack can develop a leak or lose lifting power, so keep its manual, warranty details, and manufacturer’s emergency contact easy to find.
Keep the support phone number or email in your vehicle or workshop. If the jack leaks, won’t lift, or won’t hold a load, use the manual and model/serial number sticker to reach the correct service channel. Don’t disassemble it beyond routine priming or fluid checks without guidance.
Call support before using the jack if you see oil puddles, damaged seals, reduced lift height, hydraulic fluid spurting, or spongy lifting. These signs can indicate pressure loss. Stop work and secure the load with jack stands while you wait. Tell the technician about slow lifting, air bubbles after travel, and any low or unknown fluid level.
Conclusion
Keep your floor jack clean, dry, and correctly stored, and follow a routine inspection schedule. Check for leaks, damaged welds, and smooth operation; bleed trapped air or inspect cold-weather fluid as needed.
Always work on level ground, chock the wheels, and support the vehicle with properly rated jack stands, never rely on the jack alone. If you find damage or uncertain operation, stop using the jack and contact the manufacturer or a qualified service professional.
Engine Hoist Boom Capacity Checker
Compare engine weight with your hoist's data-plate rating at each boom position: utilization, margin and the longest position within rating.
Truck & Farm Jack Reach Checker
Enter lift-point, target and jack heights to see if a jack fits under your truck and reaches the height needed to lift the tire.
Low Profile Floor Jack Fit Checker
Enter your jacking-point clearance and target lift height to see which of 17 spec-verified low profile floor jacks fit under your car and reach.
Transmission Jack Height and Capacity Planner
Enter transmission weight, your margin and mount height to see which listed transmission jacks reach your lift or floor job and carry the load.
Jack Point Pad and Adapter Picker with Height Stack
Check jack pad adapter fit: pick a pad type for your jacking point and see if the jack + pad height stack still fits under the car.