Engine Hoist Capacity Chart by Boom Position: Why Extension Cuts Lift
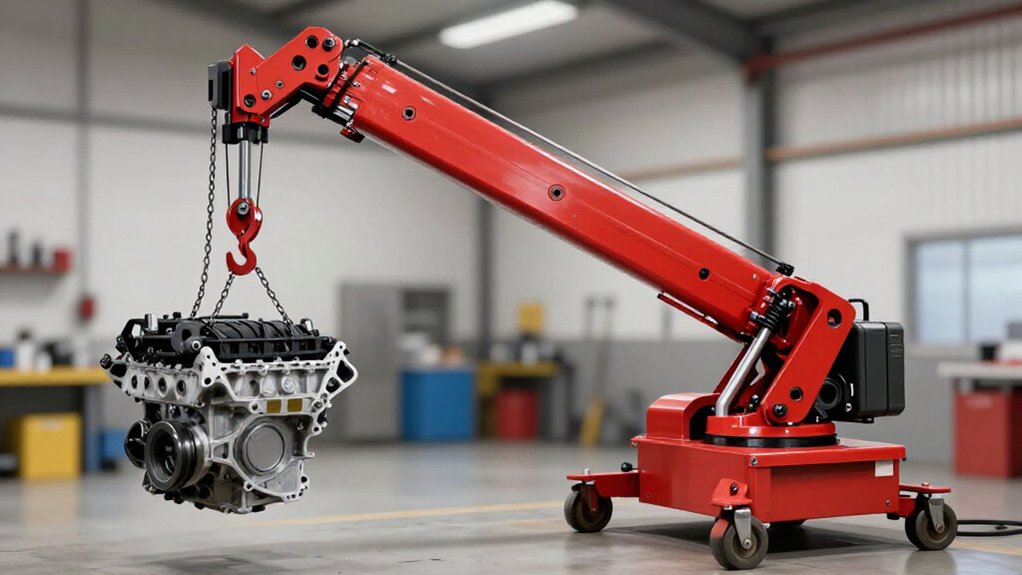
Extending an engine hoist’s boom increases moment and stress, so you must use the lower capacity listed for that boom position. Match the pin-hole setting and boom angle to the chart; don’t borrow a rating from another position or interpolate. Measure load radius in the chart’s units, then subtract deductions from the rating and include the load block and rigging in load weight.
Keep the hoist level and line vertical. The chart notes reveal further safeguards.
Boom Extension Reduces Capacity
Extending the boom generally reduces an engine hoist’s rated capacity because the longer boom increases the load moment and the stresses on the structure. With greater reach, the same payload creates a larger moment, increasing overturning demand and structural loading. Your manufacturer’s chart reflects stability limits, structural strength, or both.
Therefore, extended-boom capacity is typically lower than capacity at shorter reach. Before lifting, check the chart for the actual boom angle and extension state; ratings don’t transfer between configurations. Ratings assume stationary, static lifting, not movement or dynamic loading. Treat the listed value as the maximum for that setup, and don’t estimate from another configuration. If chart details are unclear, contact the manufacturer before lifting; never exceed the capacity stated for your hoist’s current configuration.
Boom Pin-Hole Positions
The boom pin-hole position defines the geometry you must match to the capacity chart. Each hole sets a discrete boom angle and effective geometry, so the chart’s allowable capacity changes with the selected position. Don’t treat a hole as an arbitrary height setting: pin the boom where its position matches a labeled chart mark.
| Position | Check |
|---|---|
| Specified hole | Matches labeled boom angle |
| Locked pin | Seats fully in hole |
Before lifting, align the angle indicator with the boom’s horizontal reference, then verify that the pin-hole selection corresponds to that indicated position. The chart assumes this configuration and a locked pin; if you use another hole, the chart rating may not apply. Confirm both conditions before relying on the listed capacity for your specific lift.
Load Radius Measurement Units
For each chart reading, measure load radius in the manufacturer’s stated units—feet or meters—from the hoist’s swing center to the hook or attachment point. Use the chart’s distance units consistently; don’t convert informally or mix feet and meters, since that can put your measurement on the wrong capacity line.
When you change boom extension, the boom and hook geometry changes. Recalculate the horizontal distance to the hook rather than assuming the previous radius still applies. Record that radius before consulting the chart, and compare the gross load—including rigging and lifting devices—with the chart value stated for the same units.
This measurement links the hoist’s actual setup to the chart’s geometry. A unit mismatch or unchanged radius can invalidate the comparison, even when you’ve identified the correct boom configuration. Preserve the manufacturer’s unit convention throughout your calculation.
Rated Loads by Boom Angle
Your hoist’s rated load changes with boom angle, so read the manufacturer’s chart at the exact boom position. Lower angles typically reduce capacity as load moment rises, while steeper angles may increase it within the chart’s limits.
Use the listed rated value—not a calculated net figure—and adjust the boom only within its specified safe limits.
Boom Angle and Load
As you lower the boom toward horizontal, its longer effective lever arm generally reduces the rated load at a given radius; raising it typically increases capacity, as specified for that angle on the chart. When you change boom position, the geometry changes the moment transmitted to the boom and hoist structure. At the same operating radius, a higher angle usually permits a larger load because it reduces the lifting moment; a lower angle leaves less capacity.
Treat each value as applicable only to its stated angle and radius, not as a universal limit. These values assume a stationary lift under ideal conditions; movement or other departures can increase forces.
Before lifting, compare your actual boom angle with the corresponding chart entry. Measure or calibrate the angle accurately, especially when the boom must be horizontal. If the position is uncertain, don’t assume the higher-angle rating applies; verify the angle before loading to avoid exceeding the rated capacity during lifting.
Manufacturer Rating Charts
Manufacturer rating charts specify the rated load a crane can support at each listed boom angle under ideal lift conditions. When you consult the chart, match your boom’s measured angle to the corresponding labeled position, then read the rated-load value shown for that condition.
Don’t substitute an assumed figure or interpolate beyond the chart’s listed positions; the manufacturer hasn’t rated that estimate. Check the chart’s key, too: shaded, bold, or asterisked entries may identify capacities governed by structural strength, while other entries may reflect stability limits. Use the applicable line for the angle and rating category shown.
Treat the listed value as the crane’s allowable lift before deductions, not the net load available at the hook. To determine net capacity, subtract applicable deductions from the charted rated load before lifting your engine.
Lower Angles, Reduced Capacity
When you lower the boom, the hoist’s rated capacity usually decreases because that geometry reduces its stability or structural margin. For the same hook height and radius, a lower angle increases effective leverage on the hoist, so the chart assigns a lower maximum load.
Ratings cover stationary loads under ideal conditions. Match your boom angle to the corresponding chart entry. Don’t carry a value from a steeper angle into a lower-angle lift; the chart’s rating changes with the geometry. Treat the listed figure as the ceiling for that angle and radius.
If your calculation requires net capacity, subtract deductions separately from the chart rating; don’t assume a higher-angle value remains valid after lowering the boom. This reduction reflects reduced stability, structural margin, or both.
Load Limits by Position
Beyond the reduction at lower angles, an engine hoist’s load chart sets a rated capacity for each boom position. The listed value applies to the specific angle or extension shown, not to every configuration. As the boom rises, its effective moment arm changes, altering the structural and stability demands so the permitted load.
A position requiring greater lifting leverage typically carries a lower rated load. Treat chart figures as manufacturer-rated capacities based on ideal, stationary conditions; they don’t represent a dynamic allowance for a moving load. To determine your usable limit, locate the rating for the boom position you’re using, then subtract any net-capacity deductions required by the manufacturer’s chart. Those deductions may account for components or attachments included in the lifting setup.
Safe Angle Adjustments
Check the load chart every time you adjust the boom: rated capacity changes with angle, so match the boom’s actual position to the exact angle line.
Higher, steeper boom angles generally reduce horizontal reach moment, which can increase the rated load for that position. But verify the value directly on the chart; ratings aren’t interchangeable across angles. Never exceed the manufacturer’s rating for your specific boom angle.
Treat each repositioning as a new capacity check. Re-verify the boom’s actual angle, then select the matching chart line before you lift. If the hoist has capacity deductions for operating conditions, calculate net capacity by subtracting those deductions from the manufacturer’s load rating. Confirm that net capacity meets or exceeds your required gross load. Otherwise, don’t lift.
Reading the Capacity Chart
Use the hoist manufacturer’s load chart to find the rated capacity for the exact boom position, such as its angle or reach at a given extension. Use the matching chart line; never substitute a rating from another angle or extension. These figures are rated structural or stability-based capacities for ideal, stationary lifts.
Treat the listed rating as gross, not net. Apply manufacturer-specified deductions for boom configuration and attachments: net capacity equals rating minus deductions.
Compare that limit with your gross load: accurate load weight plus rigging, including load block, spreader bars, and slings. Check the chart’s notes carefully, since deductions vary by model and listed equipment and boom setup. If gross load exceeds net capacity, choose a permitted boom position or reduce the load.
Side-Loading and Shock Loads
Even when the gross load falls within the chart’s rating for a boom position, that rating assumes a vertical, steady lift. Side-loading adds lateral force that increases bending stress in the boom and hook block. Charts and permitted lifts exclude side pull.
Keep your hoist line straight and vertical; don’t drag an engine sideways to align it. With a longer boom extension, its geometry and load path can make lateral forces more consequential for structural strength and stability.
Shock loading creates a hazard. A sudden start or stop, a snatch in the rigging, or a jerk after slack can momentarily raise effective load above the charted value, shrinking the safety margin. Avoid slack-and-tension cycles and move the load smoothly.
Treat every lateral pull or jerk as an added load factor; if the chart’s vertical, steady assumptions don’t hold, re-rate or decline the lift for that boom position.
Uneven Floor Setup
Because an uneven floor can shift the hoist’s center of gravity, the boom-position rating may no longer reflect the crane’s actual stability. Even a small height difference can tilt the frame, alter the lifting axis, and increase tipping risk during an extended lift.
When you use outriggers, ensure each makes full contact; uneven terrain can leave support unloaded and invalidate the chart’s assumed arrangement. If tires remain partly on irregular surfaces, the hoist may not reach the stability threshold beyond its rated capacity.
These conditions determine whether the published capacity applies to your actual base. Don’t rely on the boom-position limit until you’ve corrected support conditions and confirmed the frame sits level. Follow setup requirements before an extension lift, then select capacity for the verified configuration.
Chain Slack and Load Swing
Chain slack can turn a steady lift into a shock load: as tension takes up, the chain runs tight abruptly, and the hook and load may begin to swing.
Because the chain first rises without lifting, tension can apply suddenly and increase shock. Excess slack also lets the hook and load accelerate once the line tightens, producing oscillation. At the same boom position, that motion can briefly raise force on the chain and lifting point above the steady calculated weight.
- Keep the chain taut so you raise the load smoothly, without jerks or lateral motion.
- If the load swings, stop and take slack out under control.
- Reestablish a steady line before continuing; otherwise, repeated shocks can compound loading.
Don’t resume until motion has stopped.
Hook Latch Inspection
Inspect the hook latch before lifting: open it by hand and confirm it snaps back fully and freely, then verify it closes completely and covers the hook opening.
- Check the hook throat, latch, and retainer for cracks, deformation, excessive wear, or corrosion that could prevent engagement.
- Confirm the latch and keeper are present, correctly installed, aligned, and positioned to cover the opening; a missing, damaged, or misaligned part can let a sling or load block disengage.
- Remove the hook from service if it won’t close fully.
Compare condition and fit with manufacturer criteria before lifting, without forcing or bending latch parts by hand. Record the result; tag components “pass” only when they meet the manufacturer’s condition and operating criteria. Otherwise, tag them “do not use.”
Conclusion
Before you lift, verify the boom pin position, measure load radius in the chart’s stated units, and confirm rated capacity at the boom angle. Read the chart for your configuration; don’t assume maximum reach permits maximum load.
Keep the hoist level, avoid side-loading and shock loads, and stabilize the crane on a floor. Take up chain slack, control load swing, and inspect the hook latch before each lift. If conditions change, stop and recalculate.
Engine Hoist Boom Capacity Checker
Compare engine weight with your hoist's data-plate rating at each boom position: utilization, margin and the longest position within rating.